Posted on Leave a comment

Certify Compliance with Platform Terms and Developer Policies

Dear folks,

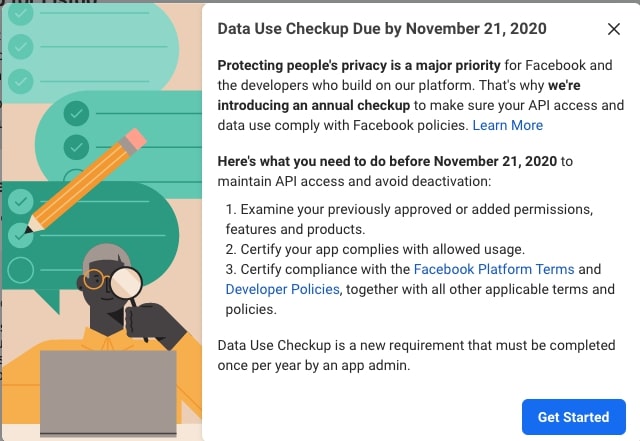
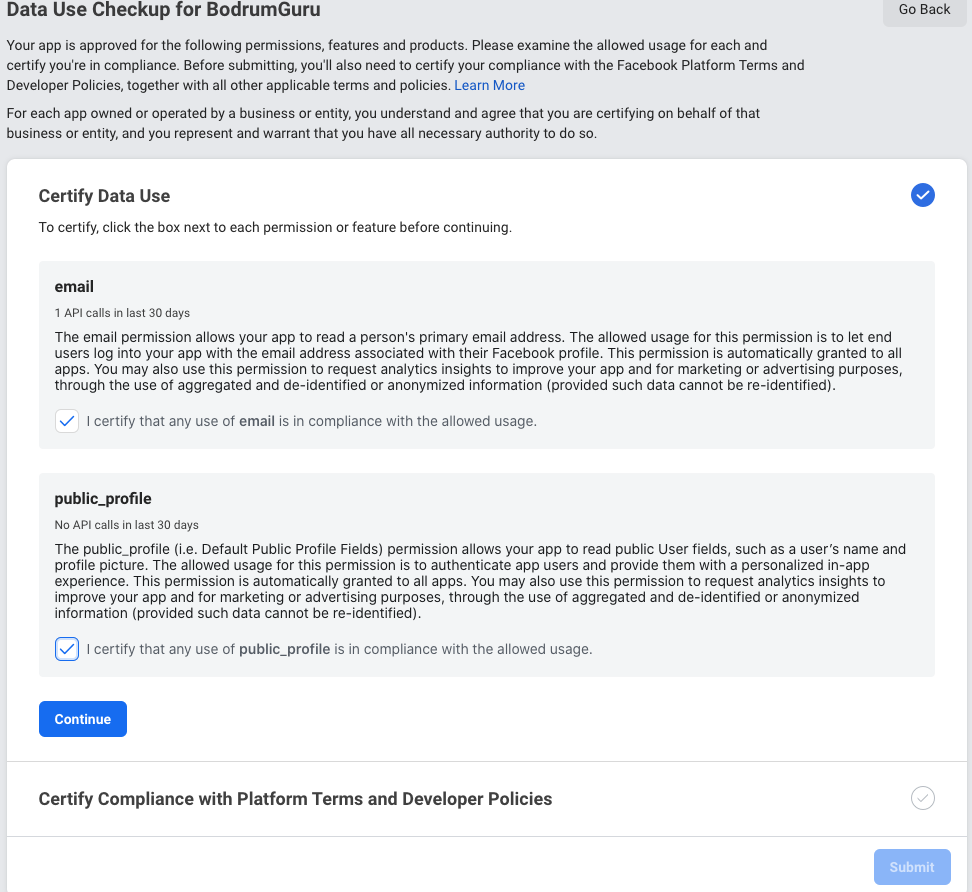
If you are using Facebook Login feature in Wilcity Listing Directory WordPress Theme & App or any WordPress Theme, make sure that you updated new Data Use Checkup policy.

To update the policy, please follow these steps:

  1. Go to https://developers.facebook.com/apps/
  2. Click on your App
  3. Read the new Facebook Policy, and then check on all required boxes if you agree to it
  4. Finally, click Submit buttom

If you have any further questions, feel free open a ticket on https://wilcityservice.com/support/

Posted on Leave a comment

How to resolve Notification issue on iOS App?

We recently got lots of feedback about Wilcity App Notification on iOS device.

After 1 week worked on this feature, We finally find the reason.

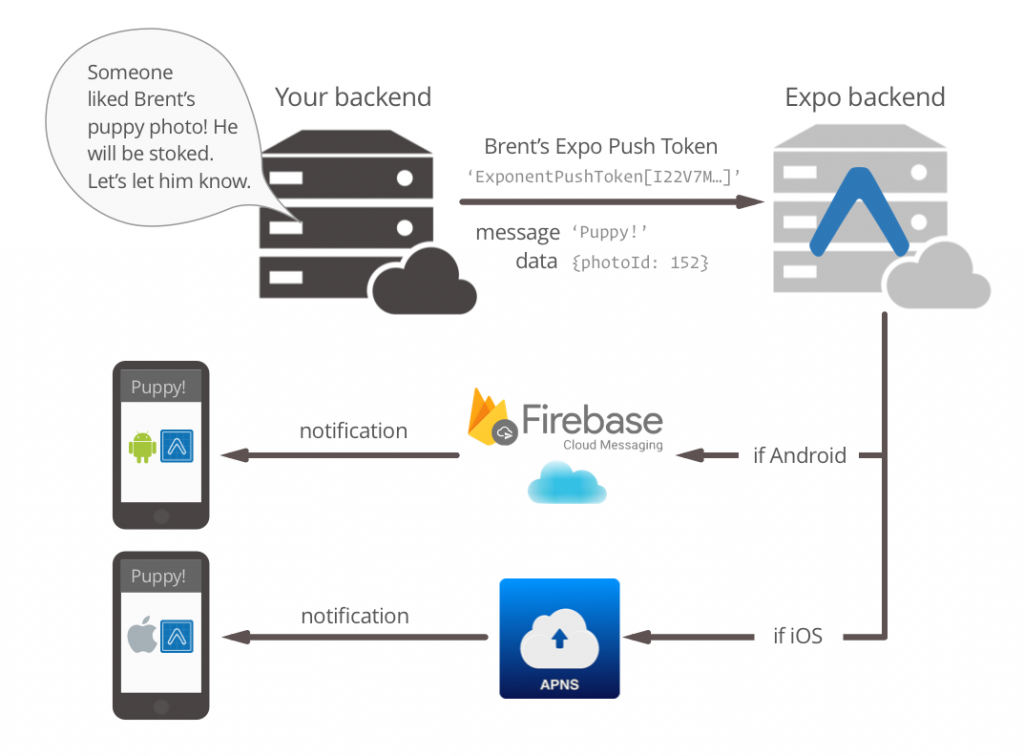
How does Notification works?

When Wilcity Web emit a notification message, Wilcity App will push a notification to EXPO server (1) . Then, Expo will push this notification to your device (2)

If (1) is successfully, We will get oke status. But as Expo explained it their documentation:

Note: a status of ok along with a receipt ID means that the message was received by Expo’s servers, not that it was received by the user (for that you will need to check the push receipt).

Why do you get this issue?

We checked on some customers App and We released that all Apps are facing (2). And the specific reason is The Apple Push Notification service key for your account could not be loaded, likely due to a malformed p8 file. Expo needs a valid PEM key in order to deliver notifications to APNs 

But why did it work before? => https://developer.apple.com/news/?id=11042019a

How can I resolve this issue?

We wrote an article about this, please read and follow https://documentation.wilcity.com/knowledgebase/how-can-test-notification-debug/ to resolve this issue

Posted on Leave a comment

Setting up Listings Tabs and Terms Slider for your App

A few days ago, We posted about Listings Tabs and Terms Slider features are coming soon on Wilcity Fanpage, and it’s available now. In this tutorial, We will show you how can you set up App Listings Tabs and Terms Slider for your App.

Step 1: Updating Wilcity Mobile App plugin

In order to use this feature, you need to update Wilcity Mobile App plugin to the latest version (1.5.4). There are 2 ways to do that:

Updating Wilcity Mobile App through Wilcity Service (Recommended)

If you still not install Wilcity Service, please click on https://wilcityservice.com/wilcity-service/ to learn how to setup this plugin.

From the admin sidebar, click on Wilcity Service -> Click on Update button on the Wilcity Mobile App plugin

Re-installing Wilcity Mobile App manually

  1. Going to https://themeforest.net/downloads
  2. Downloading Wilcity Package
  3. Extracting wilcity-package.zip
  4. Extracting wilcity.zip
  5. Now, you will see plugins folder -> Click on this folder, you will see wilcity-mobile-app.zip
  6. Logging into your site with your administrator account -> Navigate to Plugins -> Deactive and Delete the Wilcity Mobile App
  7. Finally, click on Add new Plugin -> Upload wilcity-mobile-app.zip to your site and active it

Step 2: Rebuilding Wilcity App

  1. Going to https://themeforest.net/downloads
  2. Downloading Wilcity Package
  3. Extracting wilcity-package.zip
  4. You will see wilcity-app.zip there
  5. Rebuilding your app with this version

Step 2: Setting up these features

Setting up App Listings Tabs feature

Adding these features to your app is the same what you did before:

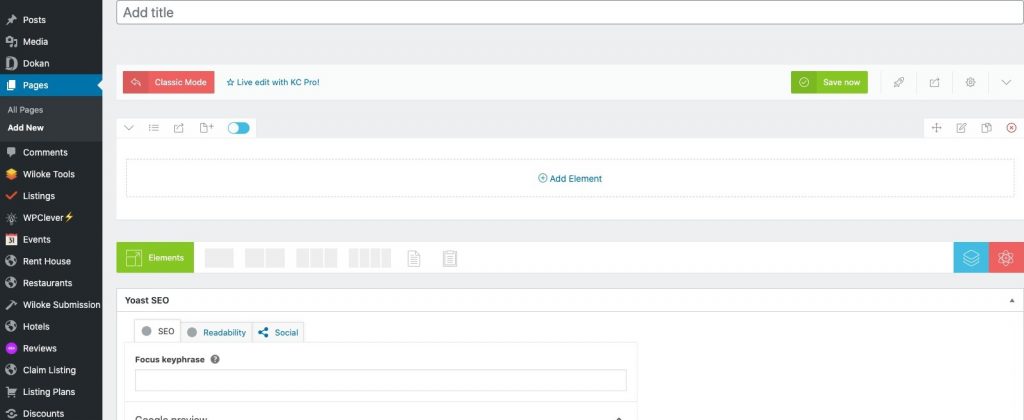
#1 From the admin sidebar, click on Appearance -> Your App Home page

#2 Clicking on Add Element link

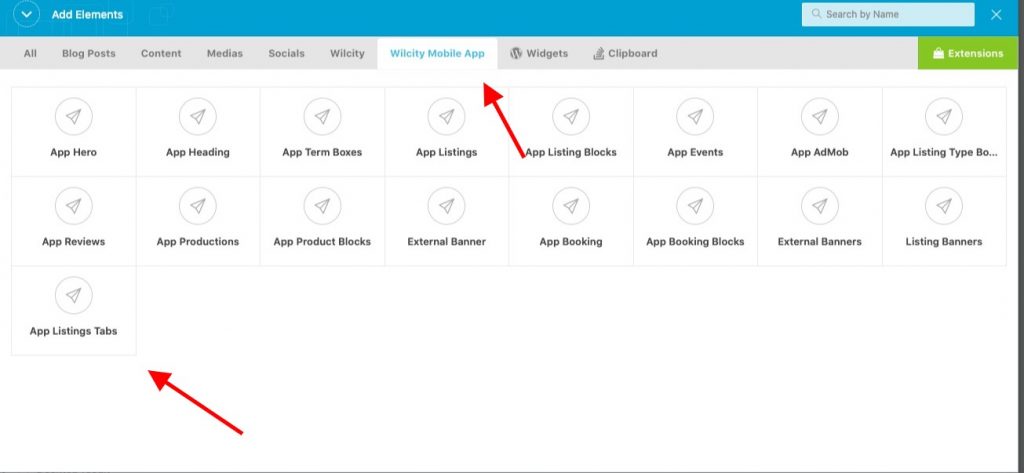
#3 Now, a window popup will be appeared -> Navigate to Wilcity Mobile App

#4: Clicking on App Listings Tabs

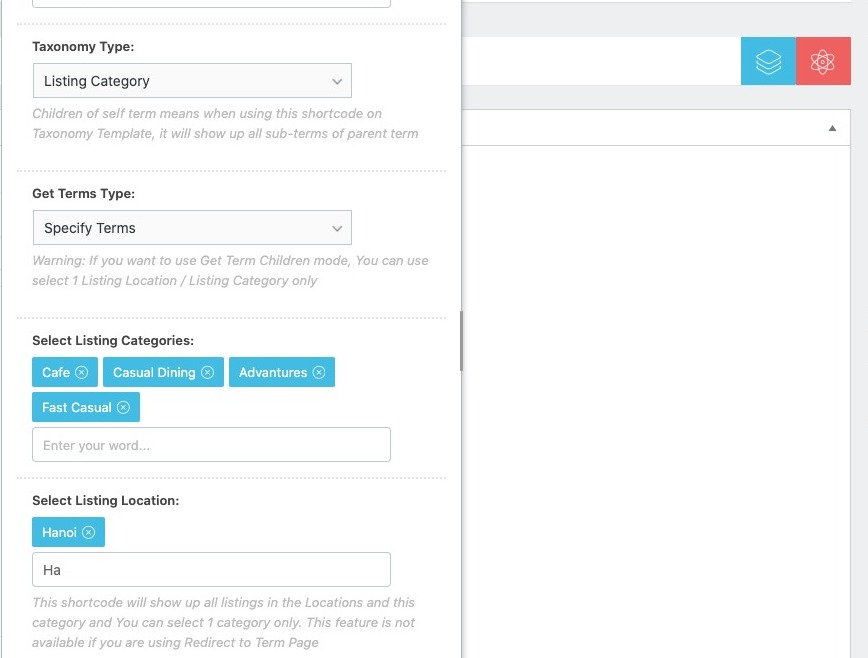
#5: Completing your configuration.

Please pay attention to Taxonomy Type setting:

If you select Listing Category as Taxonomy type, the Categories will be used as its Navigation.

If you specify a Listing Location in the block (EG: NewYork), it will filter all listings belong to a selected Category in NewYork Location

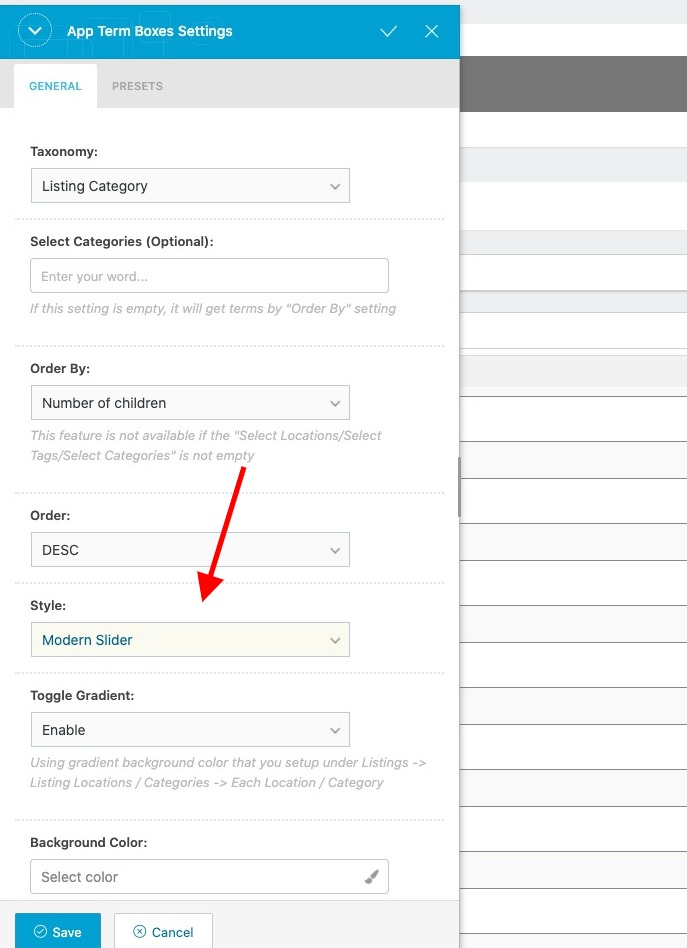
Setting up Terms Slider feature

The same Wilcity Apps Listings Tabs, but you should use Wilcity Terms Box instead. In the setting, please set Modern Slider as its style.

Hiring an expert to Build and Submit your App: https://wilcityservice.com/. Once you purchased Silver or Gold plan, you can use all Premium Plugins for free as well

Posted on Leave a comment

Tips: Creating button shortcode for Single Listing page

This tutorial, We will show you how to add a custom button shortcode to Wilcity and How can We use it in Group Custom Field

Creating Wilcity Custom Button shortcode

Step 1: Activating Wilcity Child Theme.

To create a shortcode or add custom code to the Wilcity, We highly recommend using the Wilcity Child Theme instead of the Wilcity Theme. Please read https://documentation.wilcity.com/knowledgebase/how-can-i-setup-wilcity-child-theme/ to know how can you set up it.

Step 2: Adding Wilcity Custom button to functions.php

Under the Wilcity Child Theme, you will see functions.php file. Now, please open this file with an editor like Sublime text, NotePad++

Now, put the following code to this file, it should under <?php syntax

add_shortcode('wilcity_custom_button', 'wilcityCustomButton');
if (!function_exists('wilcityCustomButton')) {
function wilcityCustomButton($aAtts, $btnName)
{
$aAtts = shortcode_atts(
[
'target' => 'self',
'link' => '#',
'meta_key' => '',
'name' => '',
'size' => 'wil-btn--sm',
'variation' => 'wil-btn--primary2',
'icon' => '',
'extra_classes' => 'wil-btn--round',
'id' => uniqid('custom_button_')
],
$aAtts
);

$btnName = empty($buttonName) ? $aAtts['name'] : $buttonName;

if (empty($btnName)) {
return '';
}

if (empty($aAtts['link']) && !empty($aAtts['meta_key'])) {
global $post;
$aAtts['link'] = WilokeListingTools\Framework\Helpers\GetSettings::getPostMeta(
$post->ID, 'custom_'.$aAtts['meta_key']
);
}

if (empty($aAtts['link'])) {
return '';
}

$classes = 'wil-btn wil-custom-btn wil-btn--round wil-btn '.$aAtts['classes'].' '.$aAtts['variation'].' '
.$aAtts['size'];
ob_start();
?>
<a id="<?php echo esc_attr($aAtts['id']); ?>" class="<?php echo esc_attr($classes); ?>"
href="<?php echo esc_url($aAtts['link']) ?>" target="<?php echo esc_attr($aAtts['target']); ?>">
<?php if (!empty($aAtts['icon'])) : ?>
<i class="<?php echo esc_attr($aAtts['icon']); ?>"></i>
<?php endif; ?>
<?php echo esc_html($btnName); ?>
</a>
<?php
$content = ob_get_contents();
ob_end_clean();

return $content;
}
}

Embedding Wilcity Custom Shortcode to Wilcity Group

Step 1: Now, please click on Wiloke Tools -> [Your Directory Type] Settings -> Add New Directory Type -> Add Group to Used Fields area

Step 2: Next, please setup your group looks the following image.

Note that you can add any key name you want

Step 3: Re-opening functions.php of the Child Theme and put the following code to this file

add_filter('wilcity_shortcode/focus-filter/wilcity_render_group_field/my_custom_button',
'wilcityCombineGroupAndCustomButton', 10, 4);
function wilcityCombineGroupAndCustomButton($html, $aSettings, $aGroupSettings, $aAtts)
{
if (!isset($aSettings['items']) || !is_array($aSettings['items'])) {
return '';
}

foreach ($aSettings['items'] as $aItem) {
if (empty($aItem['link']) || empty($aItem['name'])) {
continue;
}

$html .= do_shortcode('[wilcity_custom_button link="'.$aItem['link'].'" icon="'.$aItem['icon'].'" variation="'
.$aItem['variation'].'" extra_classes="mr-20"]'.$aItem['name'].'[/wilcity_custom_button]');
}

ob_start();
if (!empty($html)) {
?>
<?php if (!empty($aSettings['title'])) : ?>
<div class="col-md-12"><h4 class="<?php echo esc_attr(apply_filters('wilcity/filter/class-prefix',
'wilcity-group-properties-heading')); ?>"><?php echo esc_html($aSettings['title']); ?></h4></div>
<?php endif; ?>

<?php if (!empty($aSettings['description'])) : ?>
<div class="col-md-12"><p class="<?php echo esc_attr(apply_filters('wilcity/filter/class-prefix',
'wilcity-group-properties-desc')); ?>"><?php Wiloke::ksesHTML($aSettings['description']); ?></p></div>
<?php endif; ?>
<?php
}
$title = ob_get_contents();
ob_end_clean();

$html = '<div class="wilcity-'.esc_attr($aAtts['group_key']).'-wrapper">'.$title.
'<div class="wilcity-custom-button-group">'.$html.'</div></div>';

return $html;
}

Warning: wilcity_shortcode/focus-filter/wilcity_render_group_field/my_custom_button: my_custom_button is the key of group field.

Inserting Wilcity Custom Button to Single Navigation

Step 1: Navigating to Single Navigation -> Click Add New Custom Field

Step 2: Focusing your mouse on Key field -> You will see all your Custom Fields option -> Select Your Group

Step 3: Finally, click on Save Changes

Now, You can go to Listings -> Your Listing -> Add some buttons:

And you will get

Embedding Wilcity Custom Button to Input Field

You can also combine Wilcity Custom Button with Input Field / Textarea Field as well.

Step 1: Back to Add Listing area -> Add a Input / Text area field -> Save Changes

Step 2: Navigate to Single Navigation -> Click on Add New custom field

Now, you can go to Listings -> Your Listing -> Enter a link to your custom Input field

And you will see

Joining Wilcity Bundle Plugins to download all premium plugins for free

Posted on Leave a comment

Wilcity Invoice Addon

The following fonts are included with mPDF 6:

Font(s)Download URLCopyright / LicenseCoverage
DejaVuSans DejaVuSansCondensed DejaVuSerif DejaVuSerifCondensed DejaVuSansMonohttp://dejavu-fonts.org© Bitstream http://dejavu-fonts.org/wiki/License[Numerous]
FreeSans FreeSerif FreeMonohttp://www.gnu.org/software/freefont/GNU GPL v3[Numerous incl. Indic]
Quivirahttp://www.quivira-font.com/free for any useCoptic Buhid Tagalog Tagbanwa Lisu
Abyssinica SILhttp://www.sil.org/resources/software_fonts/abyssinica-silSIL Open Font LicenseEthiopic
XBRiyazhttp://www.redlers.com/downloadfont.html ( XW Zar fonts) http://wiki.irmug.org/index.php/XWZarSIL Open Font LicenseArabic
Taamey David CLMhttp://opensiddur.org/tools/fonts/GNU GPL 2Hebrew
Estrangelo Edessahttp://www.bethmardutho.org/index.php/resources/fonts.html (SyrCOMEdessa.otf)Adapted licence (free to use/share)Syriac
Aegeanhttp://users.teilar.gr/~g1951d/free for any useCarian Lycian Lydian Phoenecian Ugaritic Linear B Old Italic
Jomolharihttps://sites.google.com/site/chrisfynn2/home/fonts/jomolhariSIL Open Font LicenseTibetan
Lohitkannadahttps://fedorahosted.org/lohit/SIL Open Font LicenseKannada
Kaputaunicodehttp://www.kaputa.com/slword/kaputaunicode.htm http://www.locallanguages.lk/sinhala_unicode_convertersFree Sri Lanka Web Community CenterSinhala
Pothana2000https://fedoraproject.org/wiki/Pothana2000_fontsGNU GPL v2+Telugu
Lateefhttp://www.sil.org/resources/software_fonts/lateefSIL Open Font LicenseSindhi
Khmeroshttp://www.khmeros.info/en/fonts (http://www.cambodia.org/fonts/)LGPL LicenceKhmer
DhyanaGoogle Fonts http://www.google.com/fonts/earlyaccessSIL Open Font LicenseLao
TharlonGoogle Fonts http://code.google.com/p/tharlon-font/SIL Open Font LicenseMyanmar Tai Le
Padauk Bookhttp://www.sil.org/resources/software_fonts/padaukSIL Open Font LicenseMyanmar
Ayar fontshttp://eng.ayarunicodegroup.org/SIL Open Font LicenseMyanmar
ZawgyiOnehttp://code.google.com/p/zawgyi/wiki/MyanmarFontDownloadFreely available. No licence information availableMyanmar
Garudahttp://www.hawaii.edu/thai/thaifonts/Freely available. No licence information availableThai
Sundanese Unicodehttp://sabilulungan.org/aksara/GNU GPLSundanese
Tai Heritage Prohttp://www.sil.org/resources/software_fonts/tai-heritage-proSIL Open Font LicenseTai Viet
Sun-ExtA Sun-ExtBhttp://www.alanwood.net/downloads/index.htmlFreeware (Beijing ZhongYi Electronics Co)Chinese Japanese Runic
Unbatanghttp://kldp.net/projects/unfonts/downloadGNU GPLKorean
Aboriginal Sanshttp://www.languagegeek.com/font/fontdownload.htmlGNU GPL 3Cree Canadian Aboriginal Inuktuit
MPH 2B Damasehttp://www.alanwood.net/downloads/index.html(Public domain)Glagolitic Shavian Osmanya Kharoshthi Deseret
Aegyptushttp://users.teilar.gr/~g1951d/free for any useEgyptian Hieroglyphs
Akkadianhttp://users.teilar.gr/~g1951d/free for any useCuneiforn
Eeyek Unicodehttp://tabish.freeshell.org/eeyek/download.htmlFreewareMeetei Mayek
Lannaalifhttp://www.geocities.jp/simsheart_alif/taithamunicode.html(Unclear)Tai Tham
Daibanna SIL Bookhttp://www.sil.org/resources/software_fonts/dai-banna-silSIL Open Font LicenseNew Tai Lue
KFGQPC Uthman Taha Naskhhttp://fonts.qurancomplex.gov.sa/?page_id=42https://www.ohloh.net/licenses/KFGQPCArabic (Koran/Quran)
Posted on Leave a comment

Wilcity Advanced WooCommerce Announcement

Dear folks,

As you know, We announced to you about Wilcity Advanced WooCommerce before, but We can’t launch it this month. We are sorry for delaying!


To show up Products on Listing A, You will have to specify these products to Listing A, it’s limited.

For instance, If You are owner of a Pizza Business, We believe that you want to show up Pizza Food and Drink on your Listing, there are 2 issues now:

  1. You CAN’T separately Food and Drink on your menu
  2. If you have 10 Food Products and 10 Drink Products, You will assign 20 products to Listing. Imaging that We have 100 Listings, We will have to do 20*100 times.

We decide to delay release this plugin because We want to improve it, and We did.

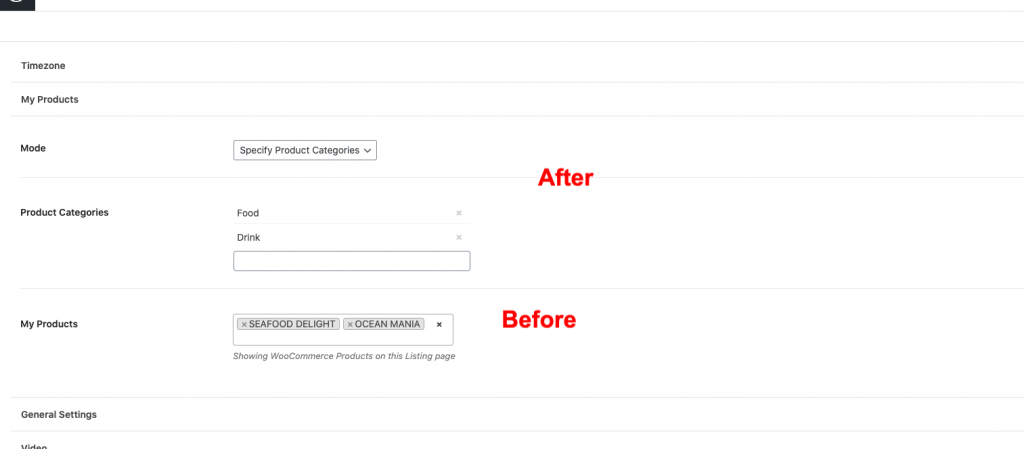
Instead of specify products to Listing:

  1. You can use specify Product Categories to the Listing
  2. Or you can use Get all my Simple products. Which means all your products will be shown up on your Listing

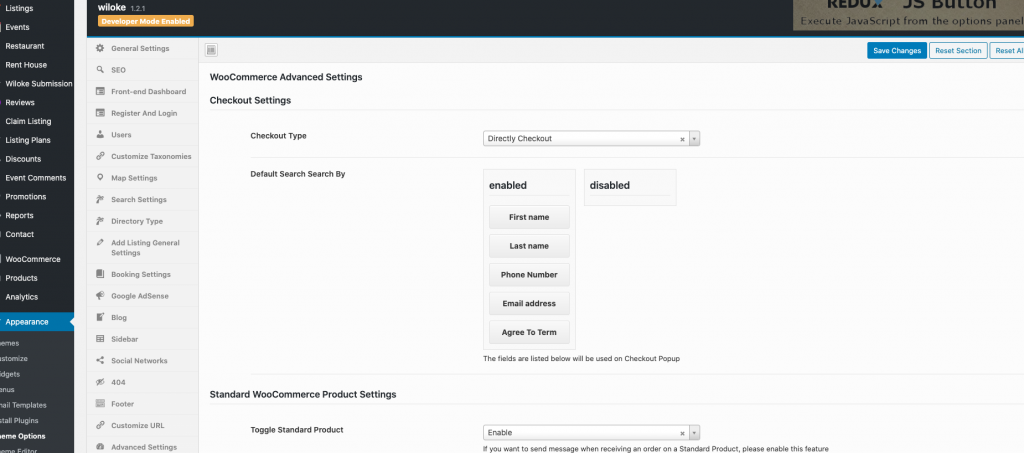
We also added Directly Checkout feature to this plugin and you can customize it.

Due to improving features on Web version, We will have to re-factory code on Wilcity App as well, this is reason why We have to delay to release it this month.

The plugin is going to release next month and you can download it for free still.

Hoping you understand for us and thank for supporting!

Best regards,

Wiloke

Posted on Leave a comment

Wilcity Translation Helper

Wilcity Translation Helper is a plugin that helps you can translate config.translation.php easier.

In order to translate config.translation.php before, You will have to download this file from wilcity theme, translate it and upload the translation file to wilcity-childtheme -> configs.folder.

With Wilcity Translation Helper plugin, you can use Loco to translate this file.

How can I setup this feature?

Before setting up this feature, make sure that you are using the latest version of Wilcity and Wilcity Plugins.

Wilcity Service is an useful tool for updating: https://wilcityservice.com/wilcity-service/

Step 1: Click on Wilcity Service -> Install and Activate Wilcity Translation Helper plugin

Step 2: Click on Loco from the sidebar (If you do not see Loco, please read https://documentation.wilcity.com/knowledgebase/wilcity-translation/) -> Themes -> Search for Wilcity

Step 3: Translate Wilcity theme

Step 4: Finally, click on Sync Wilcity Translation button

Posted on Leave a comment

Adding an iFrame to Single Listing

Some customers asked us for “How can I Embed iFrame like Youtube to Single Listing”. In this tutorial, We will show you how to do that.

Step 1: Installing Wilcity Child Theme

Before adding custom shortcode, make sure that you uploaded Child Theme to your site, You can follow this tutorial to do it: https://documentation.wilcity.com/knowledgebase/how-can-i-setup-wilcity-child-theme/

Next, log into your site -> Themes -> Activate Wilcity Child Theme

Step 2: Adding wilcity iframe shortcode to Child Theme

Now, copy the following code and add it to functions.php of Child Theme. The code should under <?php syntax

(You can use File Zilla or the same tool to upload code)

use WILCITY_SC\SCHelpers;
use WilokeListingTools\Framework\Helpers\GetSettings;
if (!function_exists('wilcityRenderIframeField')) {
    function wilcityRenderIframeField($aAtts)
    {
        $aAtts = shortcode_atts(
            array(
                'post_id' => '',
                'key' => '',
                'is_mobile' => '',
                'height' => '350px',
                'width' => '100%',
                'title' => '',
                'extra_class' => '',
                'title_tag' => 'div'
            ),
            $aAtts
        );

        if (!empty($aAtts['post_id'])) {
            $post = get_post($aAtts['post_id']);
        } else {
            $post = SCHelpers::getPost();
        }

        if (empty($aAtts['key']) || !class_exists('WilokeListingTools\Framework\Helpers\GetSettings') || empty($post)) {
            return '';
        }

        if (!GetSettings::isPlanAvailableInListing($post->ID, $aAtts['key'])) {
            return '';
        }

        $src = GetSettings::getPostMeta($post->ID, 'custom_' . $aAtts['key']);

        $src = apply_filters("wilcity_shortcode/wilcity_render_iframe_field/" . $post->post_type . "/" . $aAtts['key'], $src, $aAtts);

        if (empty($src)) {
            return '';
        }

        if(strpos($src, 'youtube') !== false) {
            $aParse = explode('v=', $src);
            $src = 'https://www.youtube.com/embed/'.$aParse[1];
        }

        $title = '';
        if (!empty($aAtts['title'])) {
            $title = '<' . $aAtts['title_tag'] . ' class="wilcity-text-sc-title">' . $aAtts['title'] . '</' . $aAtts['title_tag'] . '>';
        }

        $class = $aAtts['key'];
        if (!empty($aAtts['extra_class'])) {
            $class .= ' ' . $aAtts['extra_class'];
        }

        ob_start();
        ?>
        <div class="wil-wrapper-iframe-field <?php echo esc_attr($class); ?>"><iframe src="<?php echo esc_url($src); ?>"  height="<?php echo esc_attr($aAtts['height']); ?>" width="<?php echo esc_attr($aAtts['width']); ?>" frameborder="0"  allowfullscreen></iframe></div>
        <?php
        $content = ob_get_contents();
        ob_end_clean();

        return $title . $content;
    }
}

add_shortcode('wilcity_render_iframe_field', 'wilcityRenderIframeField');

It should look like this

Step 3: Adding iFrame field to Add Listing area

From the admin sidebar, click on Wiloke Tools -> Listing Settings -> Drag an Text Field to Used Fields area.

The field key should contains iframe in its name

Then click Save Changes

Step 4: Adding iFrame to Single Navigation

Now, navigate to Single Navigation and click on Custom Field.

On the Field Key -> Select Youtube

and it’s very important, You have to replace the content with

[wilcity_render_iframe_field key={{iframe_1585673749183}} width={{100%}} height={{300px}}]

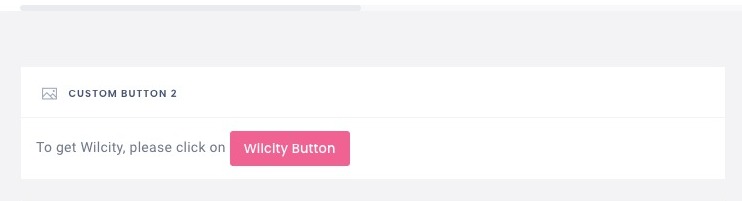
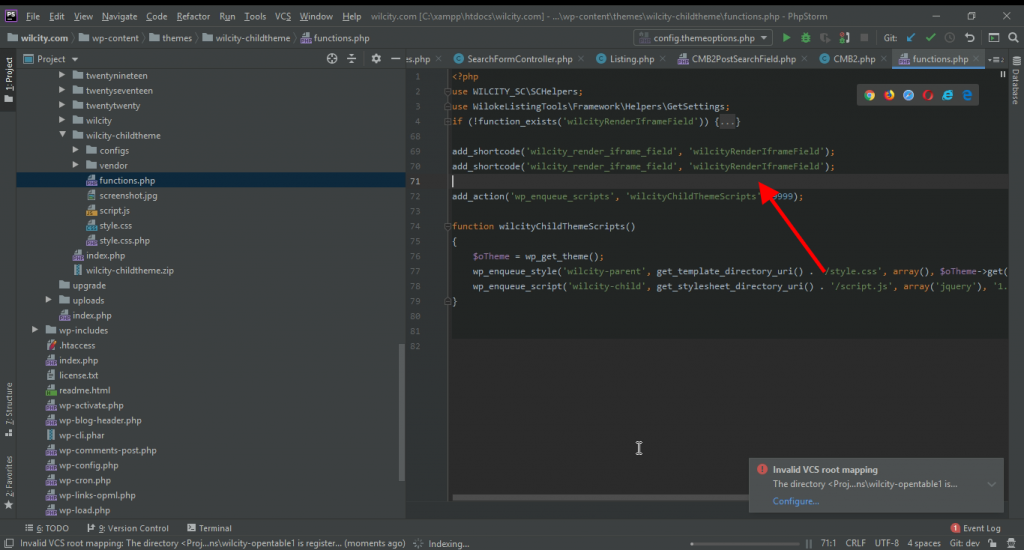
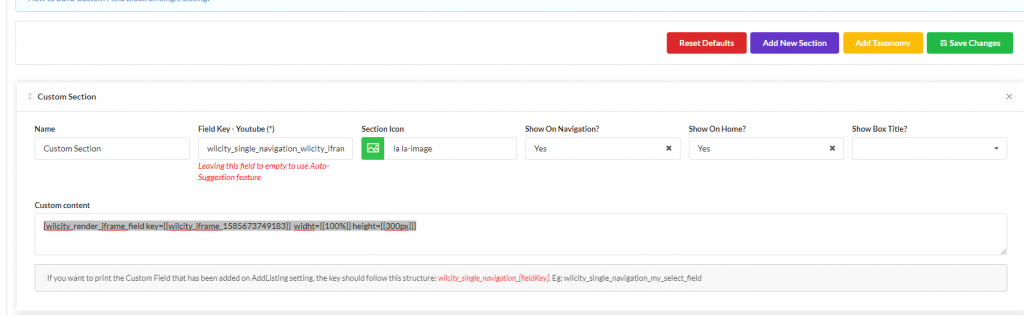
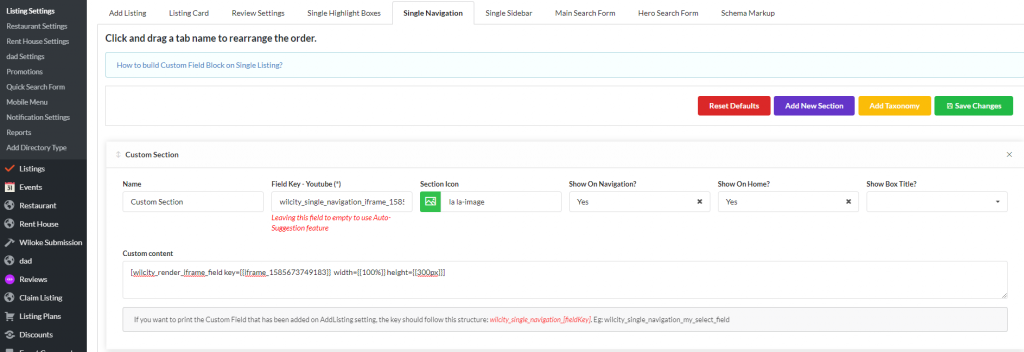
width and height are not fixed, You can use yours values

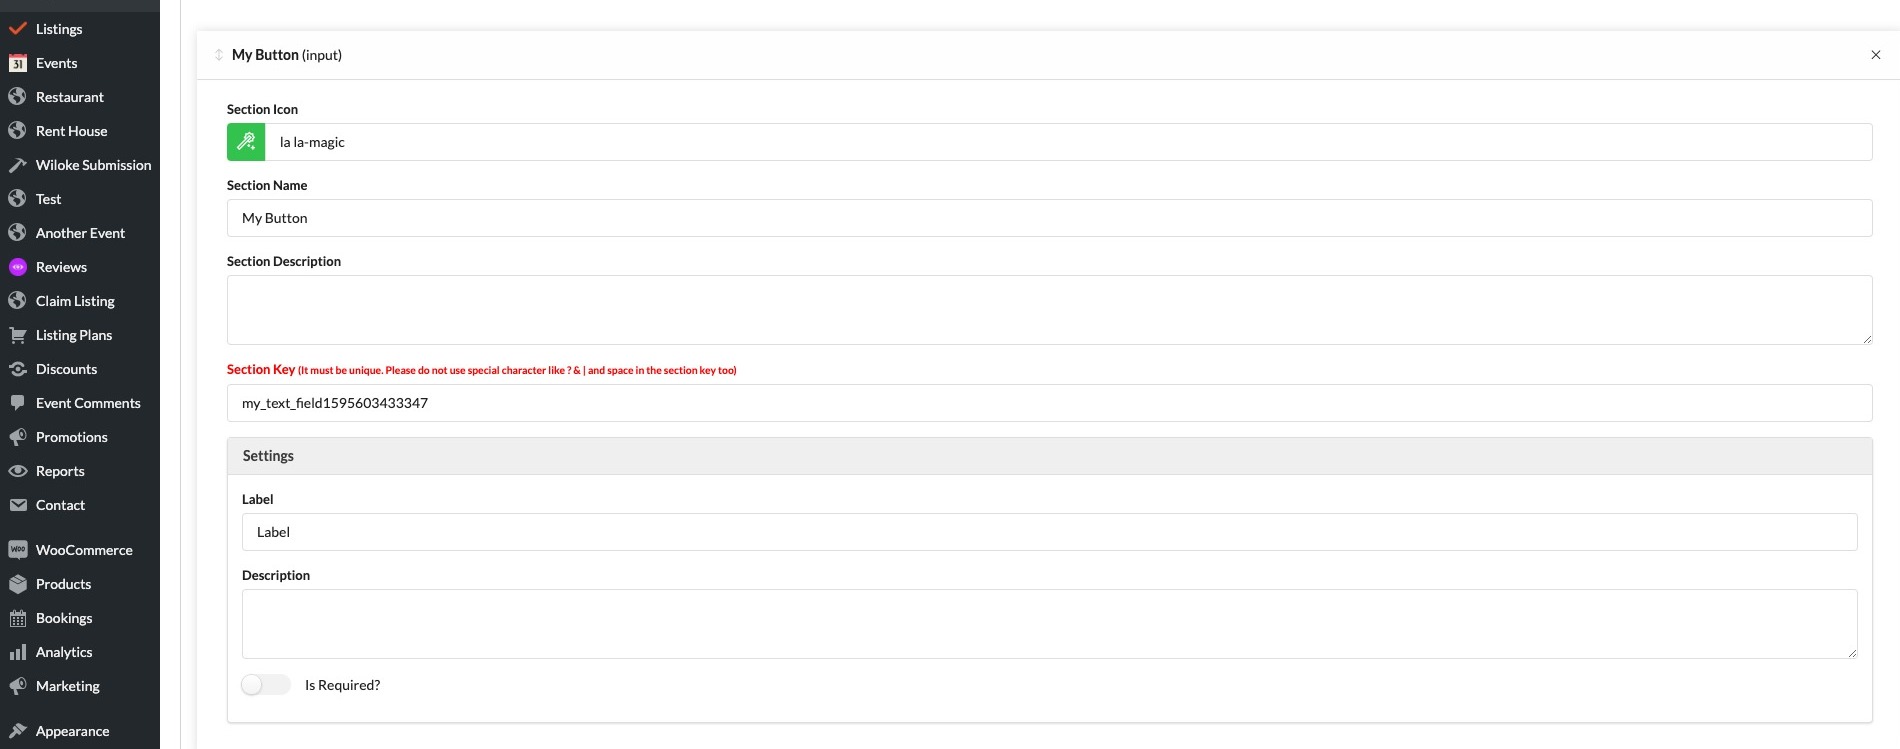
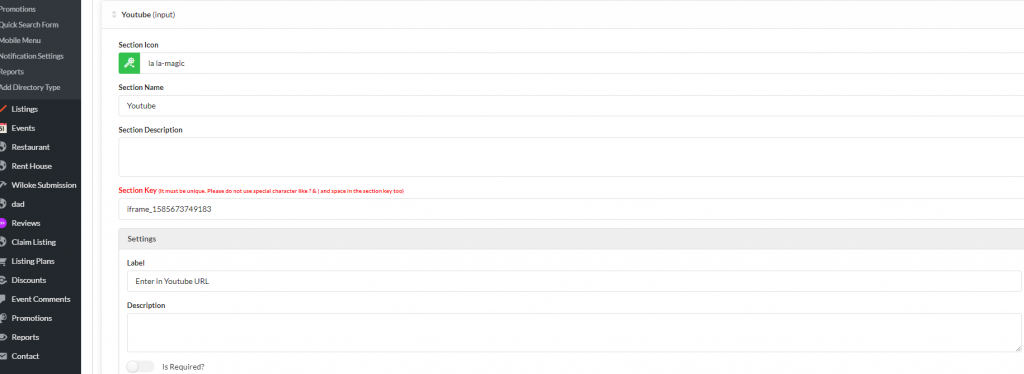
iframe_1585673749183 is they key of your custom field that you created on Add Listing area

Finally, click Save Changes.

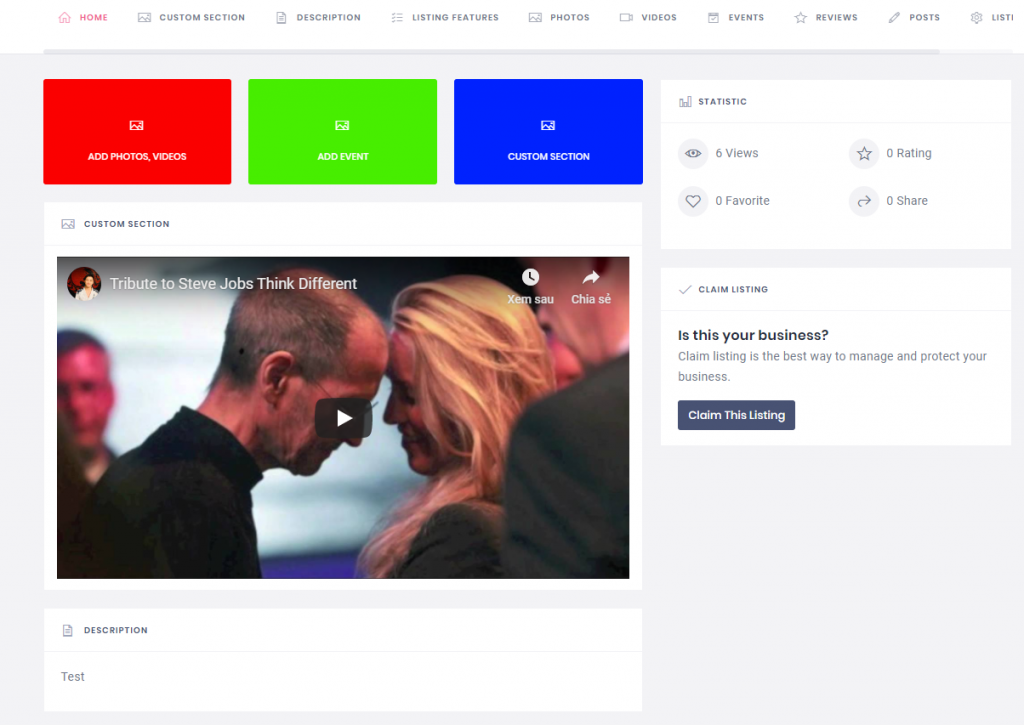
Adding a video to iFrame

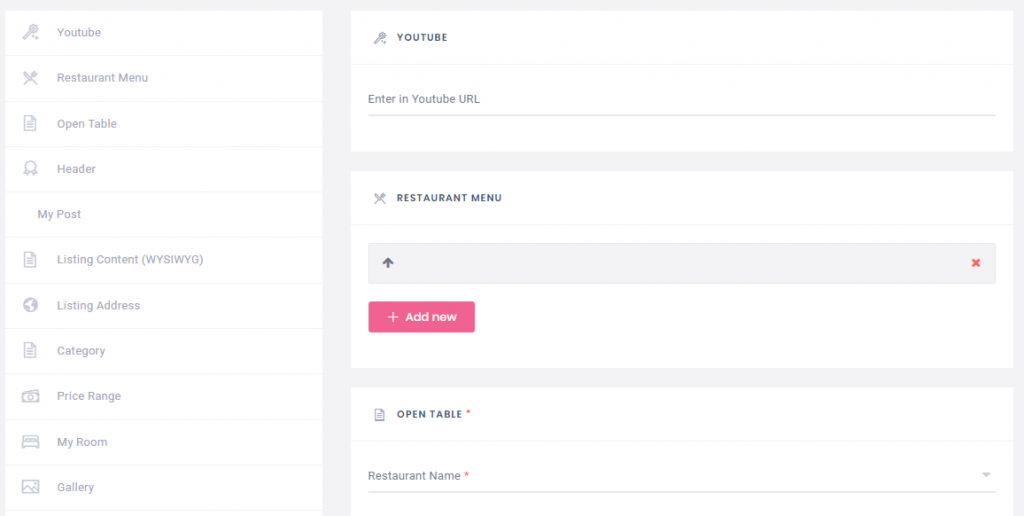
It’s the same other features, You can now add video source through Admin or Frontend – Add Listing page

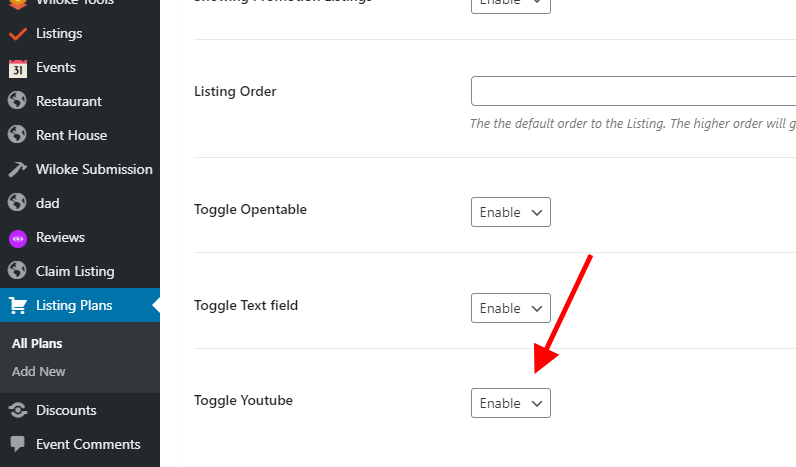
You can also Enable / Disable it on a specify plan under Listing Plans

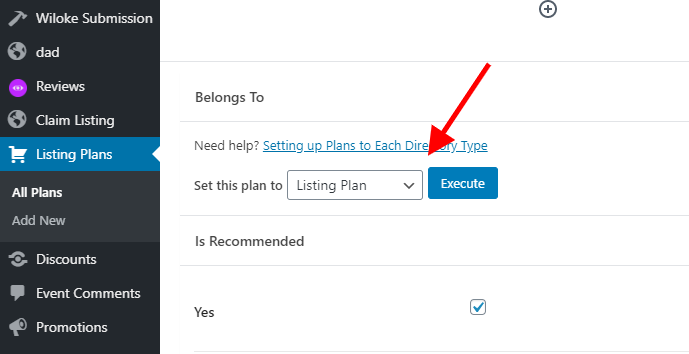
Make sure that this plan is set to a Listing Type before. If you not do it, please add this plan to a specified Listing Type -> Click Update and Refresh website