Posted on Leave a comment

WooKit and Wilcity: A great way to collect Customer Emails and enhance your website revenue

WooKit and Wilcity: A great way to collect Customer Emails and enhance your website revenue

As you all know, setting up a Directory site is effortless. All you have to do is get a domain name, hosting, set up WordPress, and then install Wilcity. With our Wilcity theme, you just use the 1-click demo install option to create a directory site that looks exactly like the demo website Wilcity.com. However, once you’ve created your website, the following stage is to figure out how to bring the highest revenue for the owner.

Wilcity understands that wondering, so we make these tutorials to monetize its platform like:

  1. Install Google Ads.
  2. Allow customers to Submit Paid Listing to your site.
  3. Claim Listing.
  4. Google Admob on Wilcity App.
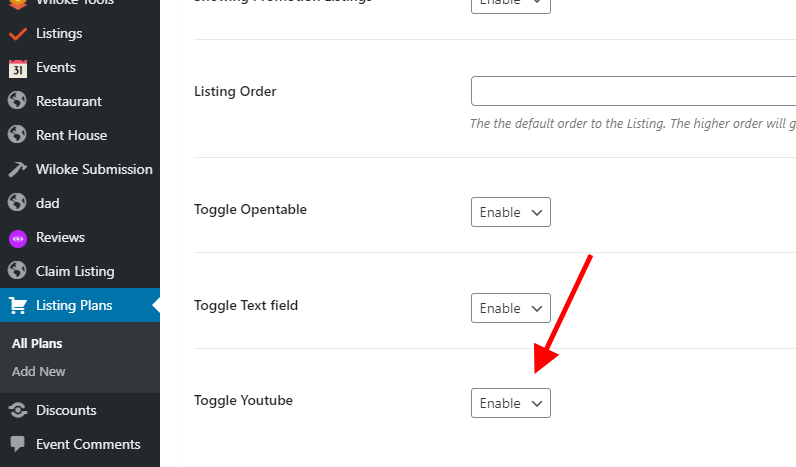
  5. Listing Promotion.
  6. Dokan and WooCommerce integration.
  7. WooCommerce Booking integration.

In general, there are numerous methods for generating cash from a website. However, to meet your revenue target, your website must have a significant enough traffic quantity as well as a stable consumer visit. Therefore, Wookit is a plugin we created specifically for this purpose.

Use social media to pull traffic

Using social networks such as Facebook, Tiktok, and Instagram is an excellent strategy to increase traffic. Wilcity is the best and most suited application for consumers who already have their own fanpage. It has a feature that automatically shares articles on social networks, so you don’t need to install any additional plugins. It means anytime you publish a new post on your website, the application will instantly post it to your Facebook fanpage. Quickly updating new content on the fanpage will assist attract clients from a wider variety, and you can also use these articles to measure the number of visitors, age, and gender. Thanks to Wilcity, reaching out to customers is now as easy as pie.

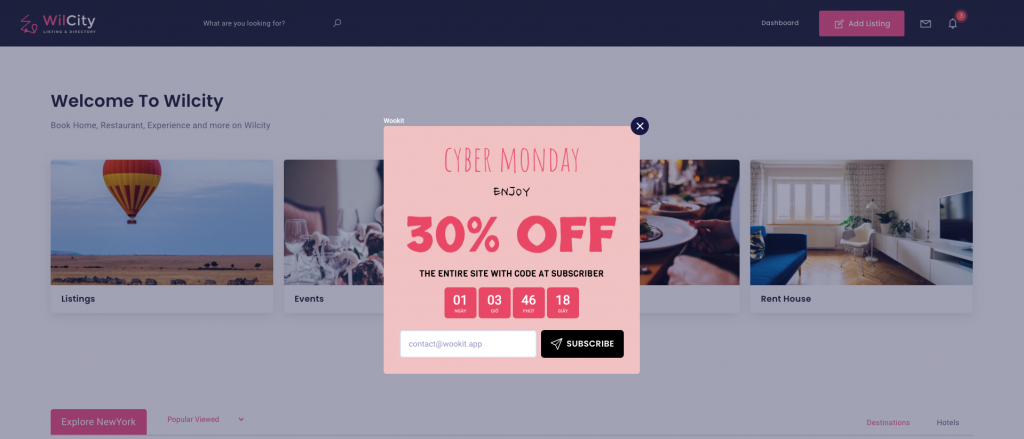
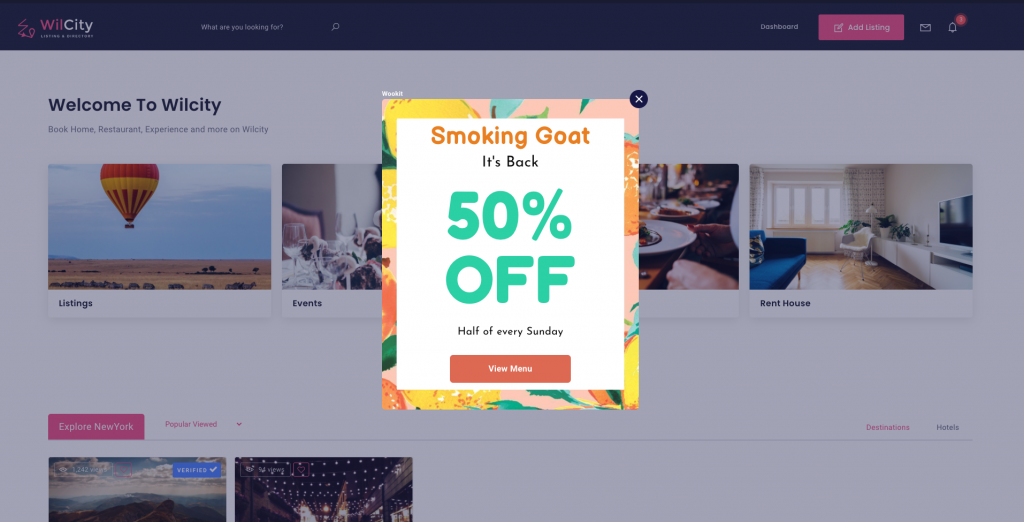
Wookit is a WordPress plugin to build popups for a variety of specific goals such as gaining social followers, collecting emails, targeting a URL, and so on.

Write plenty of Blog posts:

The listing section is where you or your clients can write a review about a specific location, restaurant, or hotel. As a result, you can make blog posts about your experiences and mention the hotel or restaurant locations that you want to introduce. For example, when sharing your Paris vacation experiences, you might include links to luxury restaurants in Paris. This gives readers the impression that these restaurants are well-known and representative of Parisian cuisine, which piques their interest and makes them want to visit. You can visit this blog to know more about it.

Make email marketing funnel

Among the several ways to approach clients, email marketing is a potential and extremely effective one. Sellers can contact customers directly via email and give them the most recent discounts or product recommendations. As a result, creating an email list of potential clients is critical.

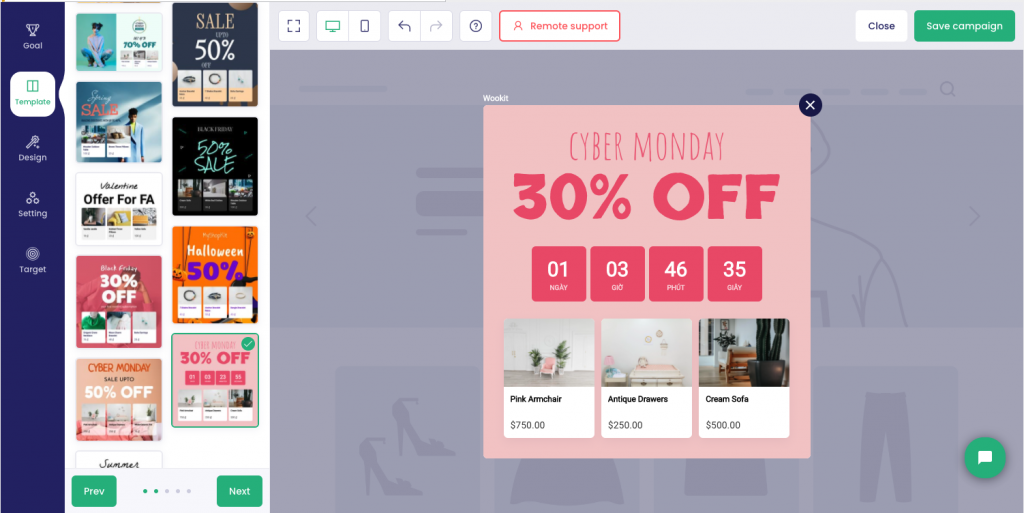
The Wookit plugin may help you efficiently collect email customers using popups, smart bars, etc. For example, a popup can collect client email information via a win wheel game or provide customers with discount vouchers or freeship. Simultaneously, making a popup on Wookit is straightforward, with 5 goals and a variety of themes to let you design your own popup. You do not need any coding knowledge to use and design professional popups.
You can watch this video to understand more about Wookit plugin and its excellent functions.

Watch these videos to learn more about Wookit’s full functions:

Promote WooCommerce Products With WooKit

In addition to the collecting email function, Wookit can also help you promote a product or a booking product. You may create product types in WooCommerce of Wookit. For example, on Shopee, we can see product types such as Fashion, Cosmetics, Electronics, etc as well as non-physical product types such as hotel booking, electronic scratch cards. Customers can book a hotel room on Wookit easily and rapidly, or receive some suggested goods like this link.

Advertise for special customers and use advertising to enhance sales

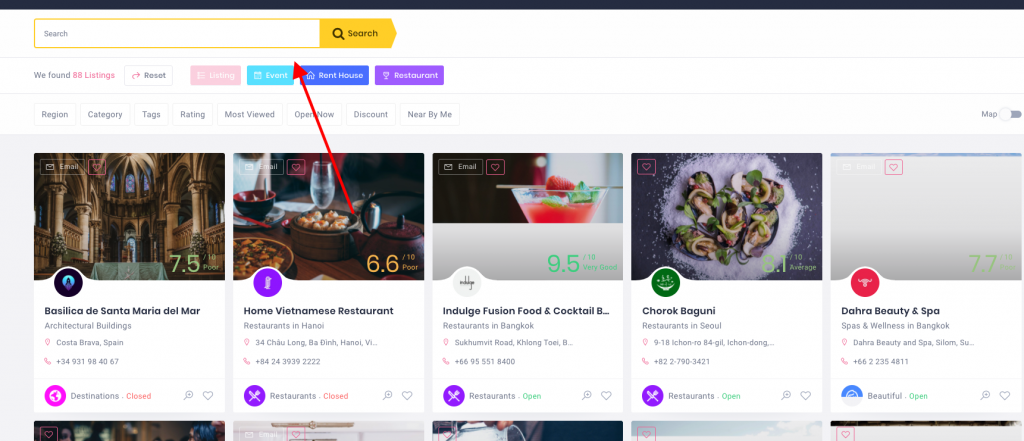
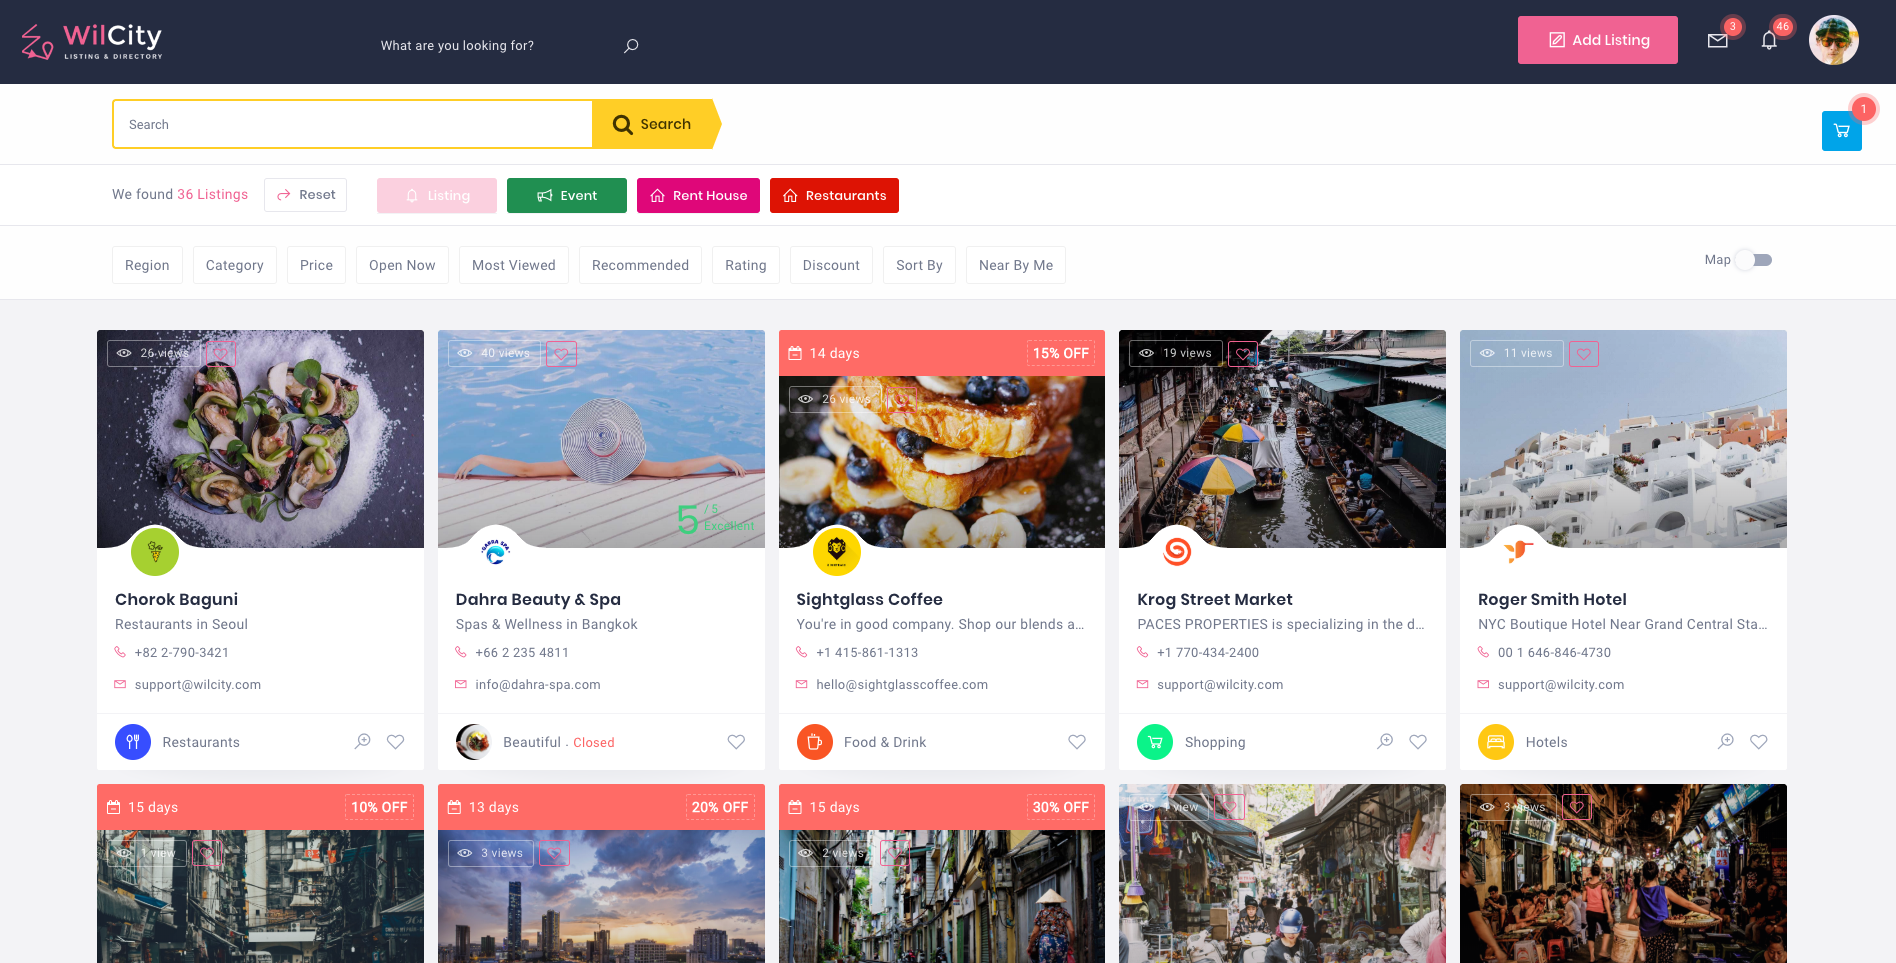
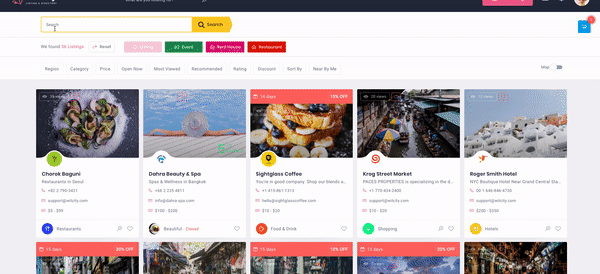
Using Wilcity and numerous unique themes, you can build websites with content focusing on one field such as restaurant reviews, hotel reviews, movie reviews, and so on. At that moment, the clients who contribute revenues to the web are the listing owners who wish to market their business to everyone. They may want to pay money to have their listing (for example their restaurant) displayed on a prominent position of the homepage. For example, if a customer searches for a nice sushi restaurant, their listing (restaurant) will be the first to emerge.

Wookit can introduce their listing to visitors effectively through 2 ways:

  1. Smart Bar.
  2. Popup.

Final Words

To summarize, Wookit is an extremely useful program that allows consumers to create customized websites using a variety of stunning themes. This plugin can boost your sales in various methods, like creating customer email files, advertising listings for web customers, and so on. Creating a professional website has never been simpler. Come to Wookit and enjoy all of its fantastic features.

In addition, optimizing SEO and increasing loading speed are two further ways to help you expand your website. We propose that you use Rankmath and Wiloke Optimization which is a Cache plugin designed to fit Wilcity. You can experience the loading speed on this demo website which has already used Wiloke Optimization plugin.

Posted on Leave a comment

What is a deep link?

What is a deep link?

Deep link is a type of link for mobile platforms that directs users to a particular content inside an app.

When a customer clicks on a Deep Link, there are 2 circumstances when users click on a deep link:

#1 People using laptops and computers will be redirected to another web page (as usual).

#2 People using smartphones and tablets won’t see a website. Instead:

#2.1 If they have installed the app: The deep link will open a relevant content inside the app.

#2.2 If the app hasn’t been installed yet: A pop-up window will appear and invite users to install the app. If they choose Yes, it will direct them to the app page in the App Store or CH Play.

So what are Benefits of Deep Links?

  1. Deep links are convenient and follow the mobile trend. It helps users immediately go inside the app from a mobile website or social media. Which satisfies the demand of modern life
  2. Deep links can increase sales. The convenience of deep links improves the possibility that people will buy products instead of sleeping on it then choose other products or buy it from other providers.
  3. Deep links help to earn loyal customers. Some people have installed the app but don’t use it so often. Deep links encourage them to use the app more frequently.
  4. Google also indexes mobile app deep links. That means people can find your app through search and become your new users!

Wilcity App does support Deep links!

Please read https://wilcityservice.com/wiloke-plugins/wilcity-app-deep-link/

NOTE: If you have joined our Silver or Gold Plan, please check your mailbox and reply to our email asking whether you want to include the Deep Link feature for your app. 

Posted on Leave a comment

Setting up Listings Tabs and Terms Slider for your App

A few days ago, We posted about Listings Tabs and Terms Slider features are coming soon on Wilcity Fanpage, and it’s available now. In this tutorial, We will show you how can you set up App Listings Tabs and Terms Slider for your App.

Step 1: Updating Wilcity Mobile App plugin

In order to use this feature, you need to update Wilcity Mobile App plugin to the latest version (1.5.4). There are 2 ways to do that:

Updating Wilcity Mobile App through Wilcity Service (Recommended)

If you still not install Wilcity Service, please click on https://wilcityservice.com/wilcity-service/ to learn how to setup this plugin.

From the admin sidebar, click on Wilcity Service -> Click on Update button on the Wilcity Mobile App plugin

Re-installing Wilcity Mobile App manually

  1. Going to https://themeforest.net/downloads
  2. Downloading Wilcity Package
  3. Extracting wilcity-package.zip
  4. Extracting wilcity.zip
  5. Now, you will see plugins folder -> Click on this folder, you will see wilcity-mobile-app.zip
  6. Logging into your site with your administrator account -> Navigate to Plugins -> Deactive and Delete the Wilcity Mobile App
  7. Finally, click on Add new Plugin -> Upload wilcity-mobile-app.zip to your site and active it

Step 2: Rebuilding Wilcity App

  1. Going to https://themeforest.net/downloads
  2. Downloading Wilcity Package
  3. Extracting wilcity-package.zip
  4. You will see wilcity-app.zip there
  5. Rebuilding your app with this version

Step 2: Setting up these features

Setting up App Listings Tabs feature

Adding these features to your app is the same what you did before:

#1 From the admin sidebar, click on Appearance -> Your App Home page

#2 Clicking on Add Element link

#3 Now, a window popup will be appeared -> Navigate to Wilcity Mobile App

#4: Clicking on App Listings Tabs

#5: Completing your configuration.

Please pay attention to Taxonomy Type setting:

If you select Listing Category as Taxonomy type, the Categories will be used as its Navigation.

If you specify a Listing Location in the block (EG: NewYork), it will filter all listings belong to a selected Category in NewYork Location

Setting up Terms Slider feature

The same Wilcity Apps Listings Tabs, but you should use Wilcity Terms Box instead. In the setting, please set Modern Slider as its style.

Hiring an expert to Build and Submit your App: https://wilcityservice.com/. Once you purchased Silver or Gold plan, you can use all Premium Plugins for free as well

Posted on Leave a comment

Tips: Creating button shortcode for Single Listing page

This tutorial, We will show you how to add a custom button shortcode to Wilcity and How can We use it in Group Custom Field

Creating Wilcity Custom Button shortcode

Step 1: Activating Wilcity Child Theme.

To create a shortcode or add custom code to the Wilcity, We highly recommend using the Wilcity Child Theme instead of the Wilcity Theme. Please read https://documentation.wilcity.com/knowledgebase/how-can-i-setup-wilcity-child-theme/ to know how can you set up it.

Step 2: Adding Wilcity Custom button to functions.php

Under the Wilcity Child Theme, you will see functions.php file. Now, please open this file with an editor like Sublime text, NotePad++

Now, put the following code to this file, it should under <?php syntax

add_shortcode('wilcity_custom_button', 'wilcityCustomButton');
if (!function_exists('wilcityCustomButton')) {
function wilcityCustomButton($aAtts, $btnName)
{
$aAtts = shortcode_atts(
[
'target' => 'self',
'link' => '#',
'meta_key' => '',
'name' => '',
'size' => 'wil-btn--sm',
'variation' => 'wil-btn--primary2',
'icon' => '',
'extra_classes' => 'wil-btn--round',
'id' => uniqid('custom_button_')
],
$aAtts
);

$btnName = empty($buttonName) ? $aAtts['name'] : $buttonName;

if (empty($btnName)) {
return '';
}

if (empty($aAtts['link']) && !empty($aAtts['meta_key'])) {
global $post;
$aAtts['link'] = WilokeListingTools\Framework\Helpers\GetSettings::getPostMeta(
$post->ID, 'custom_'.$aAtts['meta_key']
);
}

if (empty($aAtts['link'])) {
return '';
}

$classes = 'wil-btn wil-custom-btn wil-btn--round wil-btn '.$aAtts['classes'].' '.$aAtts['variation'].' '
.$aAtts['size'];
ob_start();
?>
<a id="<?php echo esc_attr($aAtts['id']); ?>" class="<?php echo esc_attr($classes); ?>"
href="<?php echo esc_url($aAtts['link']) ?>" target="<?php echo esc_attr($aAtts['target']); ?>">
<?php if (!empty($aAtts['icon'])) : ?>
<i class="<?php echo esc_attr($aAtts['icon']); ?>"></i>
<?php endif; ?>
<?php echo esc_html($btnName); ?>
</a>
<?php
$content = ob_get_contents();
ob_end_clean();

return $content;
}
}

Embedding Wilcity Custom Shortcode to Wilcity Group

Step 1: Now, please click on Wiloke Tools -> [Your Directory Type] Settings -> Add New Directory Type -> Add Group to Used Fields area

Step 2: Next, please setup your group looks the following image.

Note that you can add any key name you want

Step 3: Re-opening functions.php of the Child Theme and put the following code to this file

add_filter('wilcity_shortcode/focus-filter/wilcity_render_group_field/my_custom_button',
'wilcityCombineGroupAndCustomButton', 10, 4);
function wilcityCombineGroupAndCustomButton($html, $aSettings, $aGroupSettings, $aAtts)
{
if (!isset($aSettings['items']) || !is_array($aSettings['items'])) {
return '';
}

foreach ($aSettings['items'] as $aItem) {
if (empty($aItem['link']) || empty($aItem['name'])) {
continue;
}

$html .= do_shortcode('[wilcity_custom_button link="'.$aItem['link'].'" icon="'.$aItem['icon'].'" variation="'
.$aItem['variation'].'" extra_classes="mr-20"]'.$aItem['name'].'[/wilcity_custom_button]');
}

ob_start();
if (!empty($html)) {
?>
<?php if (!empty($aSettings['title'])) : ?>
<div class="col-md-12"><h4 class="<?php echo esc_attr(apply_filters('wilcity/filter/class-prefix',
'wilcity-group-properties-heading')); ?>"><?php echo esc_html($aSettings['title']); ?></h4></div>
<?php endif; ?>

<?php if (!empty($aSettings['description'])) : ?>
<div class="col-md-12"><p class="<?php echo esc_attr(apply_filters('wilcity/filter/class-prefix',
'wilcity-group-properties-desc')); ?>"><?php Wiloke::ksesHTML($aSettings['description']); ?></p></div>
<?php endif; ?>
<?php
}
$title = ob_get_contents();
ob_end_clean();

$html = '<div class="wilcity-'.esc_attr($aAtts['group_key']).'-wrapper">'.$title.
'<div class="wilcity-custom-button-group">'.$html.'</div></div>';

return $html;
}

Warning: wilcity_shortcode/focus-filter/wilcity_render_group_field/my_custom_button: my_custom_button is the key of group field.

Inserting Wilcity Custom Button to Single Navigation

Step 1: Navigating to Single Navigation -> Click Add New Custom Field

Step 2: Focusing your mouse on Key field -> You will see all your Custom Fields option -> Select Your Group

Step 3: Finally, click on Save Changes

Now, You can go to Listings -> Your Listing -> Add some buttons:

And you will get

Embedding Wilcity Custom Button to Input Field

You can also combine Wilcity Custom Button with Input Field / Textarea Field as well.

Step 1: Back to Add Listing area -> Add a Input / Text area field -> Save Changes

Step 2: Navigate to Single Navigation -> Click on Add New custom field

Now, you can go to Listings -> Your Listing -> Enter a link to your custom Input field

And you will see

Joining Wilcity Bundle Plugins to download all premium plugins for free

Posted on Leave a comment

Wilcity Translation Helper

Wilcity Translation Helper is a plugin that helps you can translate config.translation.php easier.

In order to translate config.translation.php before, You will have to download this file from wilcity theme, translate it and upload the translation file to wilcity-childtheme -> configs.folder.

With Wilcity Translation Helper plugin, you can use Loco to translate this file.

How can I setup this feature?

Before setting up this feature, make sure that you are using the latest version of Wilcity and Wilcity Plugins.

Wilcity Service is an useful tool for updating: https://wilcityservice.com/wilcity-service/

Step 1: Click on Wilcity Service -> Install and Activate Wilcity Translation Helper plugin

Step 2: Click on Loco from the sidebar (If you do not see Loco, please read https://documentation.wilcity.com/knowledgebase/wilcity-translation/) -> Themes -> Search for Wilcity

Step 3: Translate Wilcity theme

Step 4: Finally, click on Sync Wilcity Translation button

Posted on Leave a comment

Adding an iFrame to Single Listing

Some customers asked us for “How can I Embed iFrame like Youtube to Single Listing”. In this tutorial, We will show you how to do that.

Step 1: Installing Wilcity Child Theme

Before adding custom shortcode, make sure that you uploaded Child Theme to your site, You can follow this tutorial to do it: https://documentation.wilcity.com/knowledgebase/how-can-i-setup-wilcity-child-theme/

Next, log into your site -> Themes -> Activate Wilcity Child Theme

Step 2: Adding wilcity iframe shortcode to Child Theme

Now, copy the following code and add it to functions.php of Child Theme. The code should under <?php syntax

(You can use File Zilla or the same tool to upload code)

use WILCITY_SC\SCHelpers;
use WilokeListingTools\Framework\Helpers\GetSettings;
if (!function_exists('wilcityRenderIframeField')) {
    function wilcityRenderIframeField($aAtts)
    {
        $aAtts = shortcode_atts(
            array(
                'post_id' => '',
                'key' => '',
                'is_mobile' => '',
                'height' => '350px',
                'width' => '100%',
                'title' => '',
                'extra_class' => '',
                'title_tag' => 'div'
            ),
            $aAtts
        );

        if (!empty($aAtts['post_id'])) {
            $post = get_post($aAtts['post_id']);
        } else {
            $post = SCHelpers::getPost();
        }

        if (empty($aAtts['key']) || !class_exists('WilokeListingTools\Framework\Helpers\GetSettings') || empty($post)) {
            return '';
        }

        if (!GetSettings::isPlanAvailableInListing($post->ID, $aAtts['key'])) {
            return '';
        }

        $src = GetSettings::getPostMeta($post->ID, 'custom_' . $aAtts['key']);

        $src = apply_filters("wilcity_shortcode/wilcity_render_iframe_field/" . $post->post_type . "/" . $aAtts['key'], $src, $aAtts);

        if (empty($src)) {
            return '';
        }

        if(strpos($src, 'youtube') !== false) {
            $aParse = explode('v=', $src);
            $src = 'https://www.youtube.com/embed/'.$aParse[1];
        }

        $title = '';
        if (!empty($aAtts['title'])) {
            $title = '<' . $aAtts['title_tag'] . ' class="wilcity-text-sc-title">' . $aAtts['title'] . '</' . $aAtts['title_tag'] . '>';
        }

        $class = $aAtts['key'];
        if (!empty($aAtts['extra_class'])) {
            $class .= ' ' . $aAtts['extra_class'];
        }

        ob_start();
        ?>
        <div class="wil-wrapper-iframe-field <?php echo esc_attr($class); ?>"><iframe src="<?php echo esc_url($src); ?>"  height="<?php echo esc_attr($aAtts['height']); ?>" width="<?php echo esc_attr($aAtts['width']); ?>" frameborder="0"  allowfullscreen></iframe></div>
        <?php
        $content = ob_get_contents();
        ob_end_clean();

        return $title . $content;
    }
}

add_shortcode('wilcity_render_iframe_field', 'wilcityRenderIframeField');

It should look like this

Step 3: Adding iFrame field to Add Listing area

From the admin sidebar, click on Wiloke Tools -> Listing Settings -> Drag an Text Field to Used Fields area.

The field key should contains iframe in its name

Then click Save Changes

Step 4: Adding iFrame to Single Navigation

Now, navigate to Single Navigation and click on Custom Field.

On the Field Key -> Select Youtube

and it’s very important, You have to replace the content with

[wilcity_render_iframe_field key={{iframe_1585673749183}} width={{100%}} height={{300px}}]

width and height are not fixed, You can use yours values

iframe_1585673749183 is they key of your custom field that you created on Add Listing area

Finally, click Save Changes.

Adding a video to iFrame

It’s the same other features, You can now add video source through Admin or Frontend – Add Listing page

You can also Enable / Disable it on a specify plan under Listing Plans

Make sure that this plan is set to a Listing Type before. If you not do it, please add this plan to a specified Listing Type -> Click Update and Refresh website

Posted on Leave a comment

Wilcity Advanced Search

Wilcity Advanced Search is an extension of Wilcity theme. This plugin helps to can easily search fields and define Search Results.

Installation

Step 1: Setting up Wilcity Service

In order to install this plugin, please make sure that Wilcity Service is setup on your site, You can click here to know how to do it.

Warning: Make sure that You are using Wilcity Service 1.1 or higher version. 

Step 2: Installing Plugin

  1. Log into your site
  2. Click on Wilcity Service from the admin sidebar
  3. Click on Install button on Wilcity Advanced Search box
  4. Finally, click Activate button

How Wilcity Advanced Search works?

Step 1: Customizing your Search Engine

Click on Appearance -> Theme Options -> Advanced Search Settings. You can customize your search engine here.

Complex and Top Search Target

What is Complex Search?

Complex Search are search fields that defined under Hero Search Form: Wiloke Tools -> Listing Settings -> Hero Search Form

What is Top Search?

The Top Search is Yellow Field on the Top of Search V2

How does Complex and Top Search works?

As the default, when entering a keyword, it will return 3 type of results:

  1. Geocoder
  2. Listing Location
  3. And Default Search

As the above example, when entering Hanoi, I will get 3 type of results.

Geocoder:

If We select Geocoder, Wilcity will determine Hanoi Geocoder (Latitude and Longitude). Imaging that We have a Circle and the center is Hanoi Geocoder, the Circle Radius is your setting under Appearance -> Theme Options -> Search Settings -> Default Radius.

So, all Listings within this Circle will be selected:

So, how can We setup Listing in this circle? It’s Google Address setting under each Listing: Listings -> Your Listing

Listing Location: 

It’s your Listing Location category. If We select Listing Location result, all listings that are Children of this location will be returned

Default Search: 

They are Listings that have Title and Content are matched the keyword.

Now, Take a look at the Wilcity Advanced Search setting:

You can add more type of results to the Complex and Top Search Field.

Note that if you are using Custom Post Type UI to add more categories to your site, You can add those categories to Search Results as well.

Number of Listings, Number of Terms and Number of Geocoder:

It allows You can specify maximum of results for each Result Type.

Default Search Search By:

As the default, WP Default Search will search by Title and Content. This feature will allow you to improve its query.

Posted on Leave a comment

How does Wilcity Search Form V2 work?

Wilcity 1.2.0 introduced Search Form V2 with better UX. In this tutorial, I will explain to you how it works and how can you setup it.

There are 4 parts in the Search Form:

  1. Top Search Field
  2. Post Types Navigation
  3. Filter Items
  4. And Search Results (Listings)

Top Search Field

The Top Search Field has highest position on the Search page. When a customer enters a keyword into this field, Wilcity will fetch to Google / Mapbox address, Listing Location and Listings.

If Google / Mapbox is matched keyword, it will return a list of Address Suggestion. Each of suggestion contains 3 information: Address, Latitude and Longitude. If one of these values is selected, Search by Radius will be processed. Imaging that We have a Circle, the Latitude and Longitude of the selected address is Center of this circle, and Wilcity will return all Listings that has Latitude and Longitude within this circle.

So how can You provide Latitude and Longitude to each Listing: Click on Listings -> Your Listing -> Google Address Setting.

To specify Radius to this Circle, click on Appearance -> Theme Options -> Search Setting.

If Listing Locations are matched keyword, a list of Listing Locations will be returned. If one of them is selected, Wilcity will show up all Listings belong to this Listing Location (the query parameter will combine with Search Filter Items as well). If the selected Location is a parent location, Wilcity will get all its Listing Location Children and append to Region Search Field (If it’s available)

If Listing Title / Listing Content is matched keyword, a list of Listings will be returned. When clicking on one of them, Browser will redirect to this Listing directly.

Post Types Navigation

In Wilcity, each Post Type has its Search Fields. To setup Search Field Items, click on Wiloke Tools -> [Your Listing Type] Settings -> Main Search Form.

The Post Type helps to Navigation Search Fields. In other words, when clicking on a Post Type, Wilcity will get its Search Fields on show on the Search Form.

To setup Post Type, click on Wiloke Tools -> Add Directory Type

Search Fields

The following search fields WILL NOT show up on Search Form V2: What are you Looking for ? and Where to Look?. However, you should add it to Used Fields area still. Why? It’s needed if you are using Wilcity App.

We recommend using New Price Range instead Price Range (Only use this field if you still want to use Search Form V1)

Custom Search Field: It’s very easy to add a Custom Field to Search Form V2.

Setting up Search Form V2

  1. Go to Pages -> Add New -> Enter in the Page Title -> Set this page to Wilcity Search V2 template
  2. Click Publish button
  3. Go to Appearance -> Theme Options -> Search Settings -> Assign this page to Search Page setting

Hoping this tutorial helps you understand how Search Form V2 works. Thence, You can setup a Search Fields for your site.

If you have any question, feel free open a ticket on https://wilcity.ticksy.com/tickets/ We are willing to help you