Posted on Leave a comment

How does Wilcity Search Form V2 work?

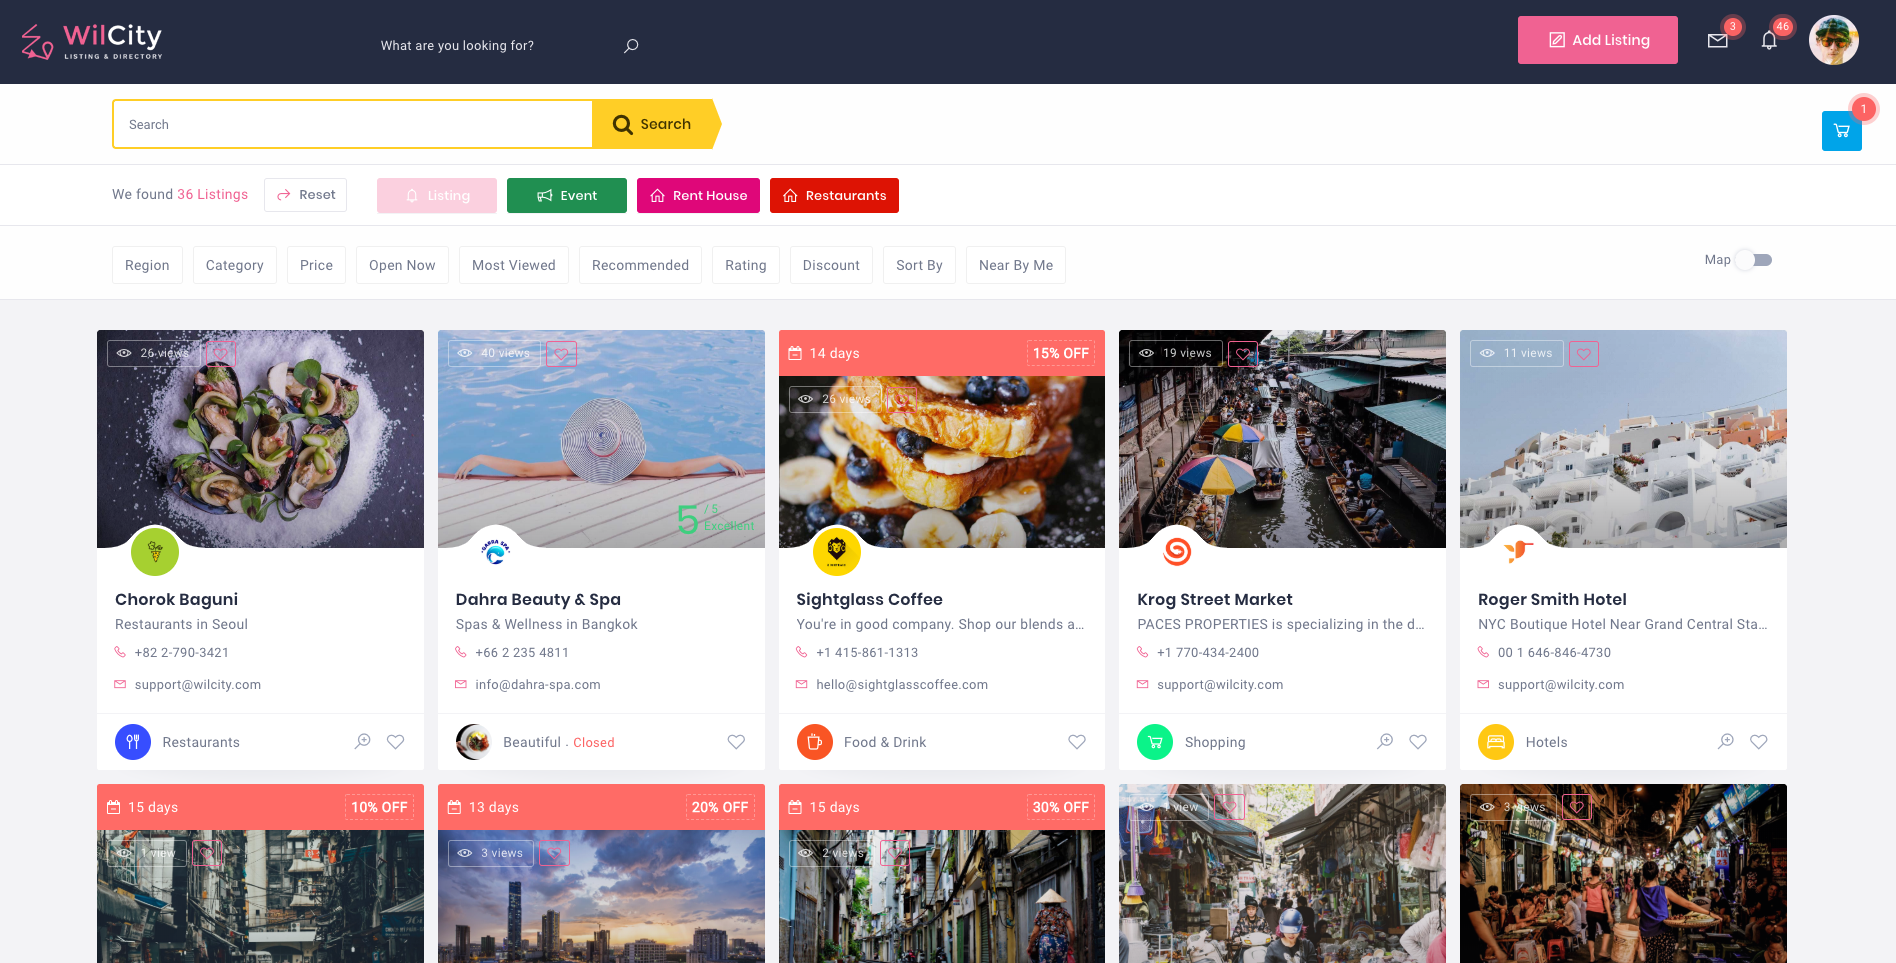
Wilcity 1.2.0 introduced Search Form V2 with better UX. In this tutorial, I will explain to you how it works and how can you setup it.

There are 4 parts in the Search Form:

  1. Top Search Field
  2. Post Types Navigation
  3. Filter Items
  4. And Search Results (Listings)

Top Search Field

The Top Search Field has highest position on the Search page. When a customer enters a keyword into this field, Wilcity will fetch to Google / Mapbox address, Listing Location and Listings.

If Google / Mapbox is matched keyword, it will return a list of Address Suggestion. Each of suggestion contains 3 information: Address, Latitude and Longitude. If one of these values is selected, Search by Radius will be processed. Imaging that We have a Circle, the Latitude and Longitude of the selected address is Center of this circle, and Wilcity will return all Listings that has Latitude and Longitude within this circle.

So how can You provide Latitude and Longitude to each Listing: Click on Listings -> Your Listing -> Google Address Setting.

To specify Radius to this Circle, click on Appearance -> Theme Options -> Search Setting.

If Listing Locations are matched keyword, a list of Listing Locations will be returned. If one of them is selected, Wilcity will show up all Listings belong to this Listing Location (the query parameter will combine with Search Filter Items as well). If the selected Location is a parent location, Wilcity will get all its Listing Location Children and append to Region Search Field (If it’s available)

If Listing Title / Listing Content is matched keyword, a list of Listings will be returned. When clicking on one of them, Browser will redirect to this Listing directly.

Post Types Navigation

In Wilcity, each Post Type has its Search Fields. To setup Search Field Items, click on Wiloke Tools -> [Your Listing Type] Settings -> Main Search Form.

The Post Type helps to Navigation Search Fields. In other words, when clicking on a Post Type, Wilcity will get its Search Fields on show on the Search Form.

To setup Post Type, click on Wiloke Tools -> Add Directory Type

Search Fields

The following search fields WILL NOT show up on Search Form V2: What are you Looking for ? and Where to Look?. However, you should add it to Used Fields area still. Why? It’s needed if you are using Wilcity App.

We recommend using New Price Range instead Price Range (Only use this field if you still want to use Search Form V1)

Custom Search Field: It’s very easy to add a Custom Field to Search Form V2.

Setting up Search Form V2

  1. Go to Pages -> Add New -> Enter in the Page Title -> Set this page to Wilcity Search V2 template
  2. Click Publish button
  3. Go to Appearance -> Theme Options -> Search Settings -> Assign this page to Search Page setting

Hoping this tutorial helps you understand how Search Form V2 works. Thence, You can setup a Search Fields for your site.

If you have any question, feel free open a ticket on https://wilcity.ticksy.com/tickets/ We are willing to help you

Posted on 1 Comment

What’s new in Wilcity 1.2.0

1. New Search Page

Wilcity 1.2 comes with power of New Search Page. Like the previous versions, You can easily drag a Search Field to Search Form area, and it resolved the disadvantage of this previous as well: Custom Field can be added to Search Form area now.

Besides, Search Without Map and Search With Map have been merged into 1 page instead of separating to 2 different pages like previous versions.

Please read https://wilcityservice.com/how-does-wilcity-search-form-v2-work/ to learn more about this feature

2. New Hero Search Form Field

In this version, We added a new field Complex Search. It’s combination of Where to looks? field, Where are looking for? and Region field in the previous versions. In short, when entering a keyword on this field, it will return maximum 3 types of result: Single Listing, Listing Location and Google Address.

If the customer clicks on:

  1. Single Listing: Browser redirects to this Single Listing directly
  2. Listing Location: Browser redirects to Search Page and search by Listing Location
  3. Google Address: Browser redirects to Search Page and search for all Listings within X KM

So when using Complex Search field, We should not use Where to looks field and Region field.

Wilcity 1.2.0 also auto remove Hero Tab Item if there is 1 Listing only.

3. Wilcity Listings Tabs

Wilcity Listings Tabs is get more stronger now. You can add a relation between Listing Category and Listing Location to this feature and add more filter Options to Listings Tabs Panel. To learn more about Wilcity Listings Tabs, please read How to setup Wilcity Listings Tabs

4. Tracking Review From the Front-end Dashboard

The listing owner now can track reviews on his/her listing from the admin dashboard. They can also hide / review a review on the dashboard as well.

5. Wilcity Term Groups Shortcode

Since Wilcity 1.2.0, You can add a Relation Between Listing Location and Listing Category to Rectangle Term Boxes, Term Boxes and Modern Term Boxes shortcode. When clicking on a Term box, browser redirects to Search Page and search for all Listings belongs to Location and Category that you picked up.

To learn more about this feature, please read Understanding Terms Group shortcode

6. Listing Types shortcode

It’s new shortcode in Wilcity 1.2.0, the shortcode allows displaying All Listing Types on the Home page. when clicking on a Listing Type, the Browser redirects to Search Page and all Listings belongs to this Listing Type will be shown up.

7. Repeated group

Wilcity 1.2 allows you can enable repeated group feature in Group Field setting. You can also use Uploader feature in the group as well.

8. WYSIWYG to Listing Content field

Your customers now can use WYSIWYG editor on Add Listing page.

9. Business Hours

With Wilcity 1.2.0, You can now set Open 24hrs to a day in a week. You can also setup Overnight Business Hour as well.

EG: If you have a Bar Listing, You can setup Open at 7 AM, and Close at 3 AM (next day)

10. Quick Access Listing Gallery

Posted on 3 Comments

How can I update to Wilcity 1.2.0.x?

All existing users should create a Staging Site and upload the new version on it first – please read https://themeisle.com/blog/wordpress-staging-site/ to learn how to create a Staging site. We added lots of features to this version, so it may conflict with a third-party plugin and your custom code, the Staging site is a safe solution for your business.

Before uploading the new version to Live site, make sure that everything is backed up (You can read and follow https://www.wpexplorer.com/backup-wordpress-site-plugins/ to learn how to do that)

Make sure that you are using the latest version of WordPress and your hosting is running PHP 7.2 or higher version.

We DO NOT recommend using any MINIFY SCRIPT plugin

How to update to new version ?

Converting data to Wilcity 1.2.0

  1. Download Wilcity Convert To 120 plugin https://www.dropbox.com/s/xwevsebrirmvlm7/wilcity-convert-to-120.zip?dl=0
  2. Login into your site
  3. Click on Plugins -> Add New -> Install this plugin
  4. Click on Wilcity Convert To 120 from the admin sidebar
  5. Click on Convert Data button
  6. You can delete this plugin after finishing

After updating all Wilcity theme and Wilcity Plugins, don’t forget to flush WordPress Cache + CDN cache before testing.