Wiloke Categories List Widget Avenue is a one-click solution that helps you organizationally send your category to any webpage in just a few seconds.
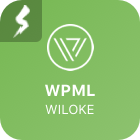
How can I install this plugin?
Make sure that you are using the latest version of Wilcity and Wilcity Plugins (You can click on Wilcity Service from the sidebar, If you see Update button on Wilcity or Wilcity Plugins -> Click the Update button)
Log into your site -> Click on Wilcity Service from the sidebar -> Click on Install button on Wilcity Advanced WooCommerce box -> Finally, click Activate this plugin
MyShopKit Design Wizard helps design images right on your site Every website needs images, and so do you.
Our mission is to help you create eye-catching images with integrated design features that add a perfect touch of style.
Every website needs images, and so do you. Our mission is to help you create eye-catching images with integrated design features that add a perfect touch of style.
Images don’t have to be complex or time-consuming. Don’t waste time creating a complicated design by yourself. MyShopKit Design Wizard takes the hassle out of designing your own graphics and allows you to focus on other important tasks. You only need one thing: a clear message that’ll make people feel what you want them to feel.
Make your business stand out
Do you want to promote your business with posters, banners, or flyers that are appealing? Our image-creating add-on will help you do so. We offer templates for various occasions: Sale events, product PR, invitations, certificates, logos, and much more! Our designs are guaranteed to catch the eye of all your potential customers.
Create anything in minutes
Designing an image is a breeze with MyShopKit Design Wizard! When you are writing content and want to add an image, open the image block, choose media library and simply open the add-on. Click & choose what you want into the template, tweak it till it’s perfect, and your design is done in minutes! You can select from our huge library of graphic elements or upload your own. We’re constantly adding more templates to keep things fresh!
Design anything with ease
After you’re done with your design, the add-on will import images into the WordPress media library so you can add them to your site without downloading. But in case you want to download your designs, you can totally do so without hassle. It’s super easy to use, so you can create amazing images without any design knowledge!
One account – many designers
When MyShopKit Design Wizard is integrated into your website, all of your content writers can access the tool. It means that more than 1 user can design different templates at once. Your staff doesn’t need to be a pro to master the tool. They’ll have minimal work and effort to produce a beautiful design in minutes!
How can I Install this plugin?
Setup Wilcity Service Client -> Click to learn how to setup this plugin Wilcity Service
From the admin sidebar -> Click on Wilcity Service -> Click Install button on the MyShopKit Design Wizard plugin
Step 6: Download Wilcity package from the ThemeForest and then extract wilcity-package.zip -> You will see wilcity-app.zip here -> Rebuild your app with the package
WooKit has every features for Popups & Smartbars to grow up your email list, create promo banners or make announcement (Why do I have to build a Customer Email List?). You can also use WooKit to promotion a Customer listing. The two examples below will show you how to do that:
Jerry is a Gold Customer, she has submitted her Restaurant business to your site and she is using Gold plan. And to celebrate one year of cooperation, You want to promote her Restaurant at a special position on your site. You can completely do it with WooKit.
Restaurant Discount
Danny is going to open his Restaurant this weekend and he wants to promote for his business. He can submit a listing to your site, and then promote it to a special place as well (EG: He will pay an extra $100 to you). You can completely do it with WooKit.
Our service not only does all the optimization configs above for you, but also includes:
Website Speed Audit:
We find out elements still slowing down your website.
Setup your hosting server for the best speed optimization.
Minify scripts of your website.
Setup Wiloke Optimization plugin.
Setup Cloudflare config for your web.
Performance Testing:
We will use GTmetrix to optimize your website more for a better speed.
You always have us do the job at Wilcity Optimization Service. Every beloved customer of the service will get a 50% discount coupon for when they want Wilcity Bundles (containing all of our premium plugins) to get the full Wilcity world.
Change Log
Version 1.0.8
Resolves Clear Cache Issue
Version 1.0.6, 1.0.7
Warning:
Since version 1.0.6, We moved Wiloke Optimization out of Wiloke Tools, You will see the Wiloke Optimization menu right on the admin sidebar instead.
After upgrading to 1.0.6, please go to Wiloke Optimization -> General Settings -> Re-enter Local Directory and press the Save Changes button.
Bug Fixes
Resolves an issue that could cause a Customer is being locked out when clicking on Dashboard issue.
Missing Admin Bar JS
Conflict with WooCommerce
Version 1.0.5
Resolves an issue that could cause Purge Nginx Cache to not working
Version 1.0.4
Resolves an issue that could cause Nginx to not clear cache
Resolves an issue that caused Local Directory to not create after clicking on Save Changes button
Version 1.0.3
Resolves an issue that could cause Wiloke Optimization Table is not to be created after activating
Version 1.0.2
Resolves an issue that could cause 500 error when flushing NGINX CACHE
NOTE: If you have joined our Silver or Gold Plan that we will build everything for you, please check your mailbox and reply to our email asking whether you want to include the Deep Link feature for your app.
Before you start
If you haven’t bought Wilcity App AddListing, click on Wilcity App AddListing product. We suggest you consider buying Wilcity Bundle Plugin to unlock all of our premium plugins and features.
Click on Wilcity Service, make sure that Wilcity and Wilcity is up-to-date
Make sure Wilcity and Wilcity Plugins are up-to-date:
If you haven’t bought Wiloke Notification Bar plugin, click on Wiloke Notification Bar product. We suggest you consider to buy Wilcity Bundle Plugin to unlock all of our premium plugins and features.
Click on Wilcity Service, make sure that Wilcity and Wilcity is up-to-date
Installing Wiloke Notification Bar plugin:
Click on Wilcity Service
Find Wiloke Notification Bar plugin then click on the button Install.
Click Active
Watch the following tutorial to set up the feature
Setting up Wiloke Notification Bar plugin
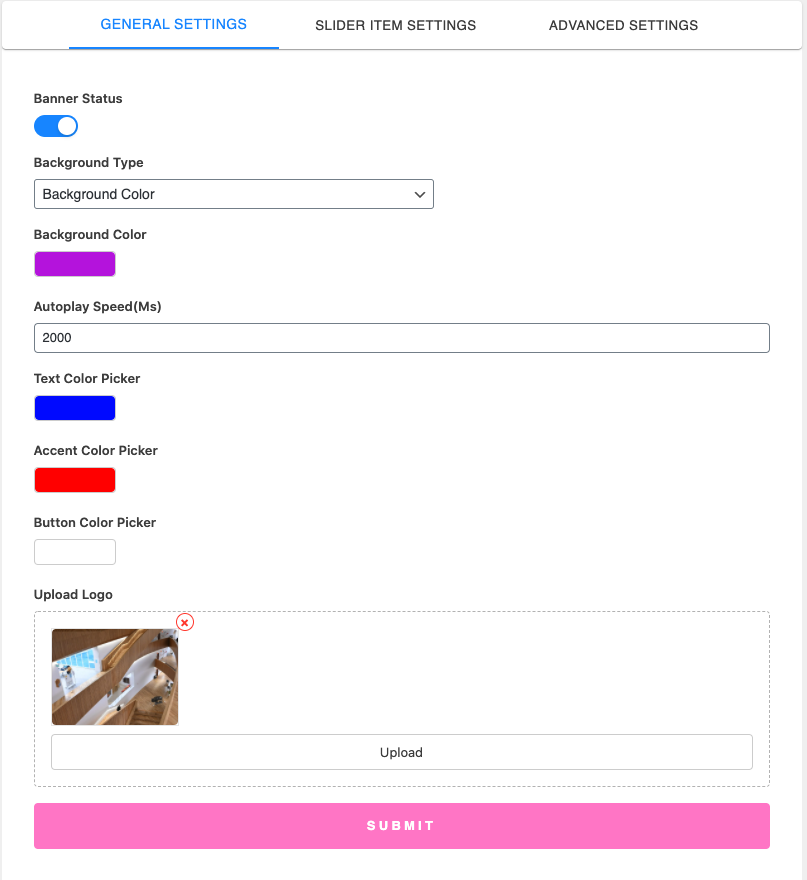
General Settings:
Here you can set the interval time between notifications, upload logo, style the background, etc.
For example, if you type 2000 at Autoplay Speed (MS), the displaying time for notification will be 2 seconds and then it will be replaced by the next one.
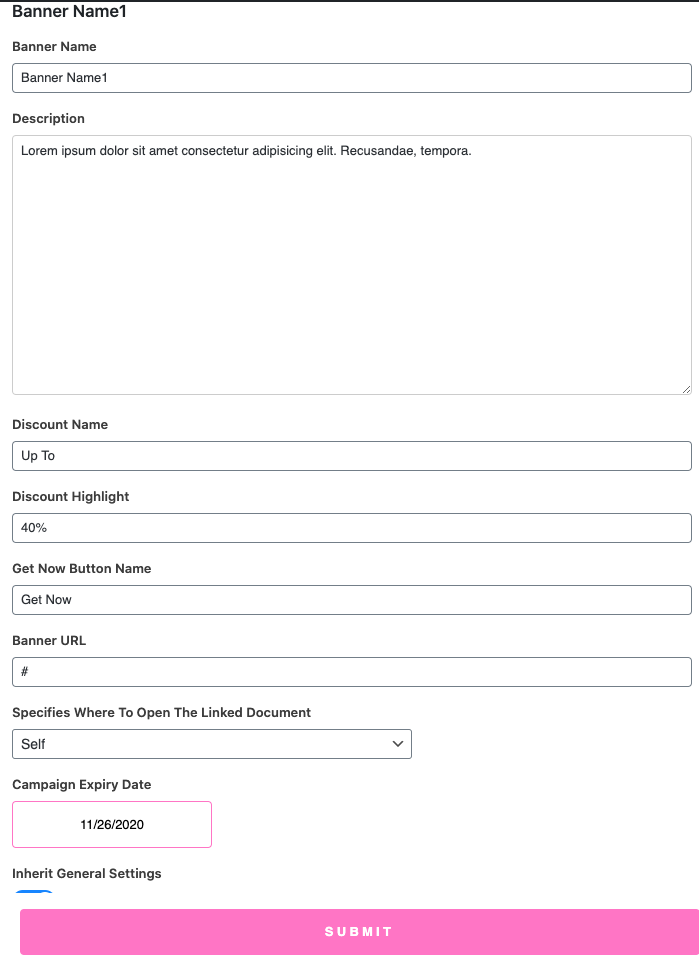
Slide Item Settings:
Each one of your notifications can have a respective setting here. You can add as many items as you want.
NOTE: In each item setting, if you enable Inherit General Settings, the notification will use settings from the tab General Settings. Therefore, turn it off if you want to set particular settings for it.
Advanced Settings
You can code some CSS here to add more styles for the notification bar. Only use this feature if you really know about your code. Or you can just use available settings from this plugin – they are enough to set up a pretty look for your notifications.
If you haven’t bought Wiloke Gmail Login plugin, click on Wiloke Gmail Login product. We suggest you consider to buy Wilcity Bundle Plugin to unlock all of our premium plugins and features.
Click on Wilcity Service, make sure that Wilcity and Wilcity is up-to-date
Setting up Wiloke Gmail Login plugin:
Click on Wilcity Service
Find Wiloke Gmail Login plugin then click on the button Install.
Click Active
Watch the following tutorial to setup the feature
Is this plugin compatible with Wilcity App?
We are developing this feature and it will be integrated on Dec, 2020
Changelog
Version 1.1.4
Resolved an issue that could cause the login with Gmail not working
Version 1.1.3
Bug Fixes:
Resolves an issue that caused undefined isContributor when signing with Gmail on the Wilcity App
Version 1.1.0
Integrated Gmail Login to Wilcity App. To integrate this feature to Wilcity App, please do the following steps:
Go to Wilcity Service -> Update Wiloke Gmail Login plugin
Download Wilcity from ThemeForest -> Then extract wilcity-package.zip -> You will see wilcity-app.zip there
If you haven’t bought Wiloke OTP plugin, click on Wiloke OTP Login product. We suggest you consider to buy Wilcity Bundle Plugin to unlock all of our premium plugins and features.
Click on Wilcity Service, make sure that Wilcity and Wilcity is up-to-date
Setting up Wiloke OTP plugin:
Click on Wilcity Service
Find Wiloke OTP Login plugin then click on the button Install.
Click Active
After it is installed, refresh the page (F5). Now you will see Wiloke OTP Login on the Admin sidebar, click on it and complete all settings there (All of them are required)
Explanation for settings:
#1 Is Enable? Turn on/off the plugin
#2 Expiration Time The time that an OTP code can work.
#3 #4 Subject and Content for the email containing the OTP code sent to users.
Do Wiloke Login work on Wilcity App?
Yes, this feature is working well on Wilcity App
ChangeLog
Version 1.1.0
Integrated OTP Login to Wilcity App
Version 1.0.1
Resolves an issue that could cause OTP Login to stop sending email when entering to Email