Wilcity App Deep Link

NOTE: If you have joined our Silver or Gold Plan that we will build everything for you, please check your mailbox and reply to our email asking whether you want to include the Deep Link feature for your app. 

How can I config this feature?

App JSON Configuration

Before working on this feature, please download the latest version of Wilcity App on the ThemeForest -> Extract wilcity-package.zip, you will see wilcity-app.zip -> It’s Wilcity app folder

Step 1: Firstly, open app.json under wilcityapp folder and name a value for “scheme”. The value must not contain uppercase or special characters.

{
    "expo": {
        "scheme": "your_scheme"
    }
}

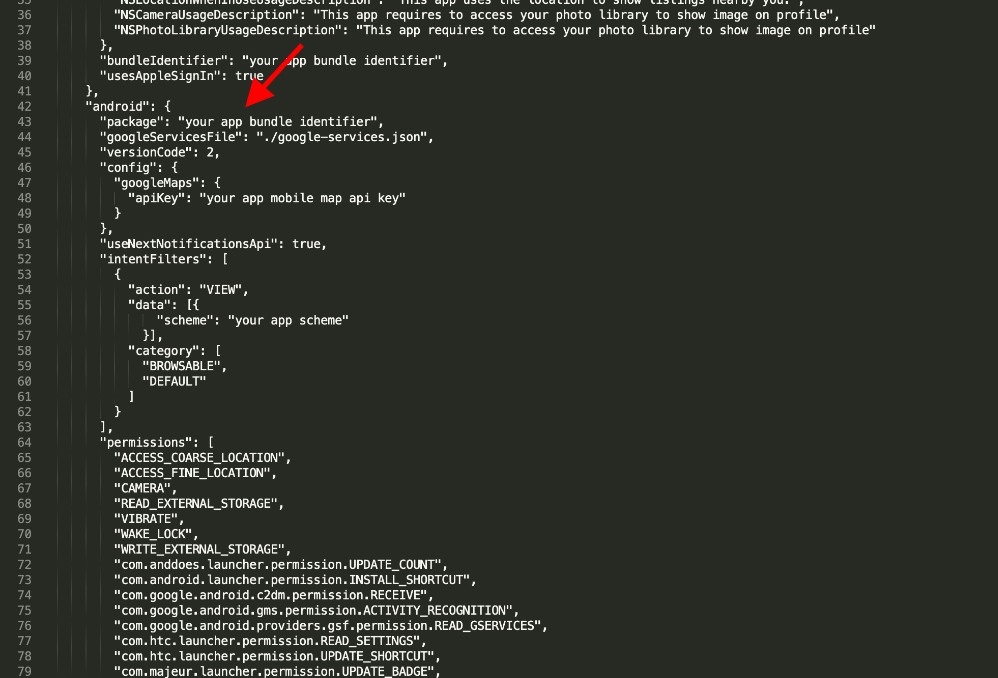
Step 2: In app.json, find the android config and copy the code below to paste inside it:

"intentFilters": [{
     "action": "VIEW",
     "data": [{
        "scheme": "your_scheme"
     }],
     "category": [
         "BROWSABLE",
         "DEFAULT"
    ]
}]

The full configuration should look like this

Remember to write your own scheme value exactly the same name that you have set at Step 1

Theme Options Configuration

Step 1. From the admin sidebar, click on Wilcity Service -> Install and Activate Wilcity App Deep Link plugin

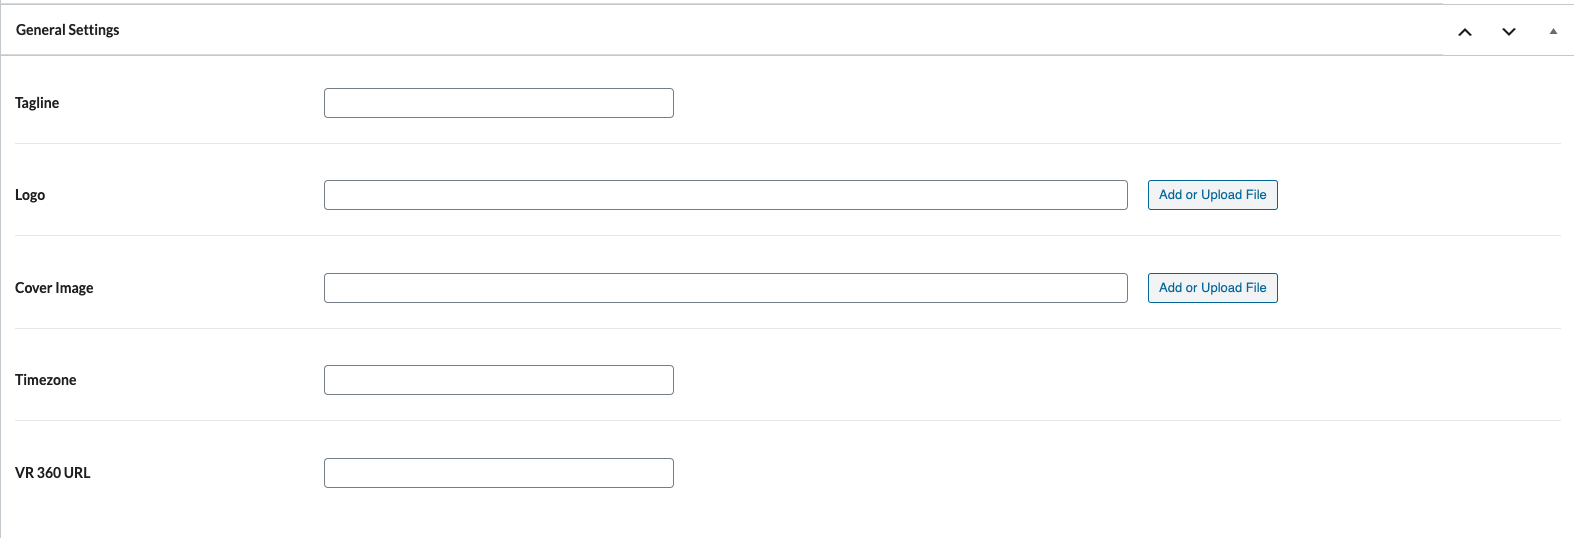
Step 2: Click on Appearance -> Theme Options -> Mobile App General Settings

Step 3: Complete the following settings

App Schema: It’s schema setting in your app.json

Android Package App: It’s package setting under android configuration in app.json

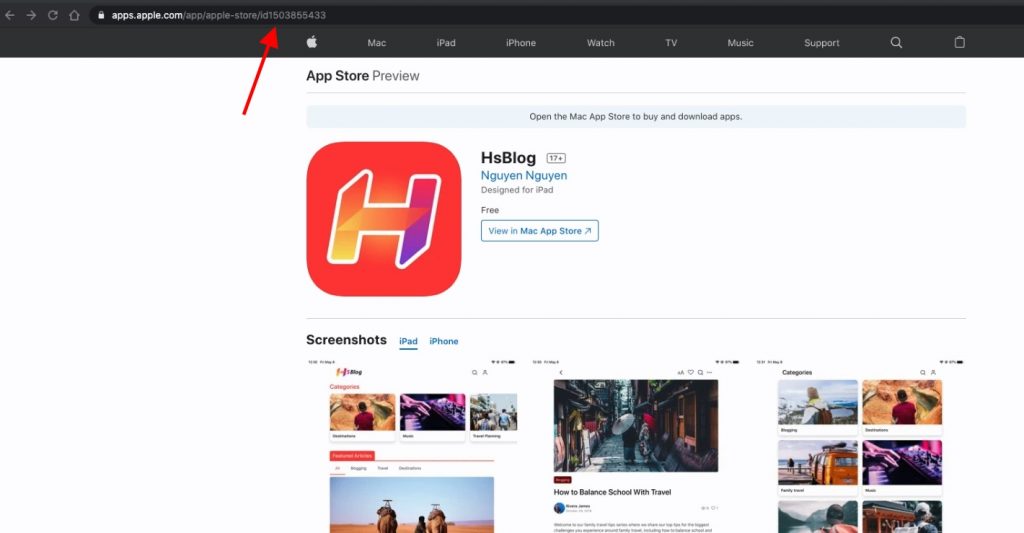
IOS App ID: You can find it in your App Store URL https://apps.apple.com/app/apple-store/id1503855433

Changelog

Version 1.0.2

Resolves deep link issue on iOS device

Version 1.0

First release

Wilcity Instafeed Hub

Wilcity Instafeed Hub is a WordPress plugin and it’s compatible with the Wilcity theme only. This plugin helps to showcase your Instagram Images, Videos in awesome pre-made gallery styles.

Demo: You can check the demo at https://demo.wilcityapp.com/listing/leon-hotel/

Buy Now: https://wilcityservice.com/product/wilcity-instafeed-hub/

Changlog: Click on me

How it works?

Please watch the following video

Is this feature compatible with Wilcity App?

Yes, It’s compatible with Wilcity App

How can I install this plugin?

  1. From the admin sidebar, click on Appearance -> Install Plugins -> Make sure that Wilcity and Wilcity’s plugins are up-to-date
  2. Make sure that you are using Wilcity Service 1.1.6 or higher version. If you are using the old version, You can go to Plugins -> Deactivate and Delete it then re-install it by following https://documentation.wilcity.com/knowledgebase/how-to-auto-update-wilcity-wordpress-theme/
  3. Purchasing Wilcity Instafeed Hub at https://wilcityservice.com/product/wilcity-vr-360-panorama/
  4. Log into your site -> Click on Wilcity Service from the sidebar  -> Click on the Install button on Wilcity Advanced WooCommerce box -> Finally, click Activate this plugin

Generate InstafeedHub Token (Since Wilcity InstafeedHub 1.1, this setting is required)

  1. Go to https://instafeedhub.com/ -> Register an account
  2. Then click on My Account -> API -> Here you will see your Access Token and your Refresh Token
  3. Now, log into your website -> Click on InstafeedHub -> Copy the information on the (2) and paste to correspondent setting here
  4. Finally, click Update

Wilcity InstafeedHub vs InstafeedHubplugins 

Differences between Wilcity InstafeedHub and InstafeedHubplugins

Wilcity InstafeedHub is built for only the Wilcity theme. It allows your users to embed/add their Instagram into their Listings.

InstafeedHub can run on all websites using WordPress. It helps to embed/add Instagram contents into a post. 

Can I use Both Wilcity InstafeedHub and InstafeedHub plugins in ONE website?

Definitely yes! You can use InstafeedHub to add your Instagram feed into WordPress Editor as backend work. Meanwhile, Wilcity InstafeedHub allows your customers to embed their Instagram feed into a post as the frontend.

Changelog

Version 1.1.5

Bug Fixes::

  1. Fixes an issue that Causing Instafeedhub could not renew token if the token was expired

Version 1.1.4

Bug Fixes::

  1. Fixes an issue that could cause Customer does not login automatically issue

Version 1.1.3

Bug Fixes::

  1. Fixes an issue that could cause Instagram to disapear

Version 1.1.1

Bug Fixes::

  1. Fixes an issue that could cause Belongs To (Listing Plan) set to Instafeed Hub Title instead of Plan name

Version 1.1.0

Bug Fixes:

  1. Fixes an issue that could prevent Admin to modify Listing Author Instagram. Notice: You need to update Wilcity theme as well.

Wilcity VR 360 Panorama

Wilcity VR 360 Panorama is a WordPress plugin and it’s compatible with Wilcity  theme only. This plugin helps to add a 360 Panorama Image to Top of your Single Listing page and Top of Single Listing App Screen.

Demo

Web Version: https://demo.wilcityapp.com/listing/leon-hotel/

App Version: https://www.youtube.com/watch?v=yDGCmLCLZQw

How can I install this plugin?

  1. From the admin sidebar, click on Appearance -> Install Plugins -> Make sure that Wilcity and Wilcity’s plugins are up-to-date
  2. Make sure that you are using Wilcity Service 1.1.6 or higher version. If you are using old version, You can go to Plugins -> Deactivate and Delete it then re-install it by following https://documentation.wilcity.com/knowledgebase/how-to-auto-update-wilcity-wordpress-theme/
  3. Purchasing Wilcity VR 360 Panorama at https://wilcityservice.com/product/wilcity-vr-360-panorama/
  4. Log into your site -> Click on Wilcity Service from the sidebar  -> Click on the Install button on Wilcity Advanced WooCommerce box -> Finally, click Activate this plugin

Is this feature compatible with Wilcity App?

Yes, it’s compatible with the both App and Web version.

If you are using Wilcity Service App Builder, our developer will rebuild App for you.

If you built app your self, please download the latest version from ThemeForest and re-built the App.

Where can I build my 360 tour?

You can use online tools like:  momento360

How can I set up this feature?

Admin area

  1. Go to Listings (Or Your Directory Type) -> Your Listing / Add New
  2. Expand General Tab
  3. You will see VR 360 URL. Now, you just need to enter in your VR 360 URL (Warning: You should not enter iFrame tag to it, just URL only)

Add Listing area

  1. From the admin sidebar, click on Wiloke Tools -> [Your Directory Type] Settings (EG: Listing Settings)
  2. If you are using Header block -> Remove it
  3. Drag / Re-drag Header block to Used Fields area
  4. You will see 360 Video URL setting there. You can add description and rename field title

On the Add listing front-end area, it will look like the following screenshot and your customer just need to enter in VR 360 URL

Can I Enable/Disable this feature on a plan?

Yes, you can. To do that, please do the following steps:

  1. Click on Listing Plans
  2. Edit / Add new a plan
  3. Now, you can Enable / Disable Toggle VR 360

Wilcity Bulk Import

Please read How to Use? to know how this feature works.

Version 1.6.2

Bug Fixes:

  1. Resolved an issue that could cause Event Date to not import if the Date Format sets to d/m/Y format

Version 1.6.1

Bug Fixes:

  1. Business Hour Import Issue

Version 1.6

  1. Migrated plugin to Wilcity Service

Wiloke Google Authenticator

Wiloke Google Authenticator is a WordPress plugin for Wilcity, it allows your customer to enable 2-factor authentication using the Google Authenticator app for Android/iPhone/Blackberry. 

To check the changelog, please click Changelog

How can I install this plugin?

  1. Make sure that you are using the latest version of Wilcity and Wilcity Plugins (You can click on Wilcity Service from the sidebar, If you see Update button on Wilcity or Wilcity Plugins -> Click the Update button)
  2. Purchasing Wiloke Google Authenticator at https://wilcityservice.com/product/wiloke-google-authenticator/
  3. Log into your site -> Click on Wilcity Service from the sidebar  -> Click on Install button on Wilcity Advanced WooCommerce box -> Finally, click Activate this plugin

How can I set up this feature?

  1. From the admin sidebar, click on Appearance -> Theme Options -> Register and Login
  2. Search for Two-Factor Authentication Login -> Enable it
  3. Enter in Two-Factor name
  4. You can skip Verification page setting

[su_button url=”https://wilcityservice.com/product/wiloke-google-authenticator/” style=”flat” background=”#20e5a7″ size=”5″ radius=”round” icon=”icon: shopping-cart”]Buy Plugin Now[/su_button]

How can Enable features work?

Step 1: Download Google Authenticator to your Mobile App.

If you are using:

  1. iOS system, please click on Google Authenticator iOS
  2. Android system, please click on Google Authenticator Android

Step 2: Enabling 2 Step-Verification through the admin area

Scan QR code

  1. From the admin sidebar, click on Users -> Your Profile
  2. Next, open Google Authenticator app on your phone -> Click on + icon -> Scan QR code (Please watch video above to know more)
  3. Finally, Enable 6 digit-codes to Verify OTP to Enable this feature field and click Verify OTP code button

Step 2′: Enabling 2 Step-Verification through the customer area

[su_button url=”https://wilcityservice.com/product/wiloke-google-authenticator/” style=”flat” background=”#20e5a7″ size=”5″ radius=”round” icon=”icon: shopping-cart”]Buy Plugin Now[/su_button]

Does Wiloke Google Authenticator work with Wilcity App?

Yes, Wilcity App supported this feature. Please make sure that you use the Wilcity App version that released after July 14, 2020.

[su_button url=”https://wilcityservice.com/product/wiloke-google-authenticator/” style=”flat” background=”#20e5a7″ size=”5″ radius=”round” icon=”icon: shopping-cart”]Buy Plugin Now[/su_button]


Changelog

Version 1.1.1:

Bug Fixes: 

  1. Resolves an issue that could cause a broken page after activating the plugin

Version 1.1:

Bug Fixes: 

  1. Resolves an issue that could cause Crash site issue if CMB2 plugin activated before installing the plugin

Wilcity Advanced WooCommerce

WooCommerce Advanced WooCommerce is a WordPress plugin, it’s compatible with Wilcity Listing Directory Theme only. This plugin allows you can:

  1. Show up WooCommerce Simple Products on a Single Listing with professional style.
  2. Customers can order products directly right on the Listing page. 
  3. After a customer ordered a product, Wilcity will send a notification (Wilcity App) + SMS to Product Vendor and Customer

How can I install this plugin?

  1. From the admin sidebar, click on Appearance -> Install Plugins -> Install and Activate: WooCommerce, Dokan, and Wilcity Mobile App
  2. Purchasing Wilcity Advanced WooCommerce at https://wilcityservice.com/product/wilcity-advanced-woocommerce/
  3. Log into your site -> Click on Wilcity Service from the sidebar  -> Click on the Install button on Wilcity Advanced WooCommerce box -> Finally, click Activate this plugin

How can I set up this feature?

My Advanced Product Mode

  1. Specify Products: This feature allows you can specify what products should be shown on the listing. The product must be created by Listing Owner
  2. Specify Product Categories: You can pick up Product categories that you want to show up on the listing. Wilcity will fetch to Product Categories and get all products that created by Listing Owner and show it up on the listing
  3. Get all author products: Wilcity will fetch all products that created by Listing owner and show it up on the listing
  4. Inherit: Inherit the default setting under Appearance -> Theme Options -> Advanced WooCommerce Settings

Checkout Settings:

  1. Default WooCommerce Checkout: When clicking on Checkout button on Single Listing, it will redirect the customer to WooCommerce Checkout page
  2. Directly Checkout: When clicking on the Checkout button, a popup will have appeared. Your customer will fill up information on the Checkout popup field and click Submit button

SMS Settings

Once a customer ordered a product, Wilcity will send 2 messages:

  1. To Product owner
  2. To the Customer

To use this feature, you need to set up Twillio Service: Appearance -> Theme Options -> Advanced WooCommerce Settings ->Twilio Settings.

Twillio Settings:

  1. Go to https://www.twilio.com/ and register an account
  2. Then you will get a Virtual Phone Number
  3. Navigate to Settings -> General to get your ACCOUNT SID and AUTH TOKEN
  4. Log into your site -> Appearance -> Theme Options -> Wilcity Advanced WooCommerce -> Twillio Settings Paste these information there

Standard WooCommerce Product Settings and Booking WooCommerce Product Settings

If you want to use the SMS feature, you can define SMS content there. Once a customer ordered a product, Wilcity will send these messages to Product owner Phone Number and Customer Phone Number.

Product Owner Phone Number

If the Product Owner entered the Phone Number under the Dokan Dashboard setting, this number will be used. Otherwise, the number under Front-end Dashboard -> Profile -> Phone Number will be used

Customer Phone Number

It’s Phone number that customer filled up on Checkout area (Popup Checkout or WooCommerce Checkout page)

ChangeLog

Version 1.1.4

New Features:

  1. Added WPML products to Product List

Version 1.1.3

Bug Fixes:

  1. Resolves an issue that could show Warning Issue on Rest API

Version 1.1

Bug Fixes:

  1. Resolves an issue that could cause Checkout Popup to show nothing if a customer is logged into the site

Version 1.1.1

Bug Fixes:

  1. Resolves an issue that could cause Checkout Popup to show nothing if you are using WordPress 5.5 or higher version

Wilcity Contact Form

Wilcity Contact Form (WCF) is a WordPress plugin and it’s compatible with Wilcity  theme only. This plugin helps to show up Contact Form on SINGLE LISTING sidebar, and customer can send an email to Listing Owner through this form. WCF is based on Contact Form 7 currently, which means We need to install Contact Form 7 plugin as well

How can I buy this plugin?

  1. You can purchase Wilcity Contact Form separately on https://wilcityservice.com/product/wilcity-contact-form/
  2. Or you can purchase Wilcity Plugin Bundle Wilcity Plugin Bundles
  3. If you purchased the following App Builder plans and it’s activating, You can download it for free: Silver Plan and Gold Plan

How can I install this plugin?

  1. From Admin sidebar, click on Plugins -> Add New -> Install Contact Form 7 plugin -> Activate it
  2. Now, click on Wilcity Service on the admin sidebar
  3. Then click on the Download button on the Wilcity Contact Form
  4. Finally, click on Activate button

Setting on Wilcity Contact Form 7 on Web version

  1. From the sidebar, click on Contact -> Add New -> Create a Contact Form -> Then click on Save button. Once the contact form has been created, you will see its shortcode -> Copy it
  2. Go to Wiloke Tools -> Listing Settings -> Single Sidebar -> You will see the Contact Form section here: Paste the shortcode to the Content area field
  3. Finally, Click on Save Changes

Setting up Contact Form 7 on App version

1. Click on Pages -> Add New -> Create a new Page

2. Assign Page Template to Wilcity Page Builder

3. Insert Contact Form 7 that you created above to WP Editor 

4. Click Publish / Update button

5. Go back to Wiloke Tools -> Listing Settings -> Single Sidebar -> Update the content looks like this

[contact-form-7 id="2614" title="contact-form-2" app-page-id="20917"]
  1. id: It’s contact form 7 id
  2. app-page-id: it’s id of page that you created above

How does this feature work?

Once a customer sends an email, Wilcity will send this email content to:

  1. If your Email setting under the Contact Info area -> It will be used. Note that if you won’t see the Contact Info, please click on Wiloke Tools -> [Your Directory Type] Settings -> Drag Contact Info to Used Fields area
  2. If the Email is empty, your registered email will be used

Wilcity OpenTable

To understand how this feature works, please read Wilcity OpenTable

Version 1.0.3:

Bug Fixes

  1. Resolves an issue that could cause Open Table to conflict with WordPress 5.5

Version 1.0.2:

Bug Fixes

  1. Resolves an issue that could cause Open Table to not show up on Sidebar

Version 1.0.1:

Bug Fixes:

Resolves an issue that could cause a conflict issue with Wilcity 1.2.2

Version 1.0:

Bug Fixes

Released

Wilcity Advanced Search

To understand how this feature works, please read Wilcity Advanced Search

Version 1.3.1:

Bug Fixes

  1. Fixes an issue that could show all Search Fields instead of Available Fields for Shop

Version 1.2.1:

Bug Fixes

  1. Fixes an issue that could cause Shop button to show up on the Search page even We disabled it

Version 1.2:

New features:

  1. Integrated Product to Search V2 https://documentation.wilcity.com/knowledgebase/setting-up-product-in-search-v2/

Version 1.1

Bug Fixes:

  1. Resolves an issue that could cause Checking Wilcity Service plugin status stop working

Version 1.0:

Released