Posted on 2 Comments

Integrating Custom Twitter Feeds to Wilcity

Thank Smash Balloon for creating an useful plugin https://wordpress.org/plugins/custom-twitter-feeds/

We got an interested question about Twitter Feed from @TokyKempen on the Wilcity Group

We absolutely can embed Twitter Feed to Wilcity, and in this tutorial, We will show up how to do it.

Step 1: Installing required plugins

[sociallocker id=”1876″]

  1. Logging into your Website
  2. Downloading Wilcity Custom Twitter Feeds plugin by clicking on https://www.dropbox.com/s/eoef19nanlna4yo/wilcity-custom-twitter-feed.zip?dl=0
  3. From the admin sidebar, click on Plugins -> Add New -> Install the plugin -> Activate it
  4. Click on Appearance -> Install Plugins -> Install and Activate Custom Twitter Feeds plugin

[/sociallocker]

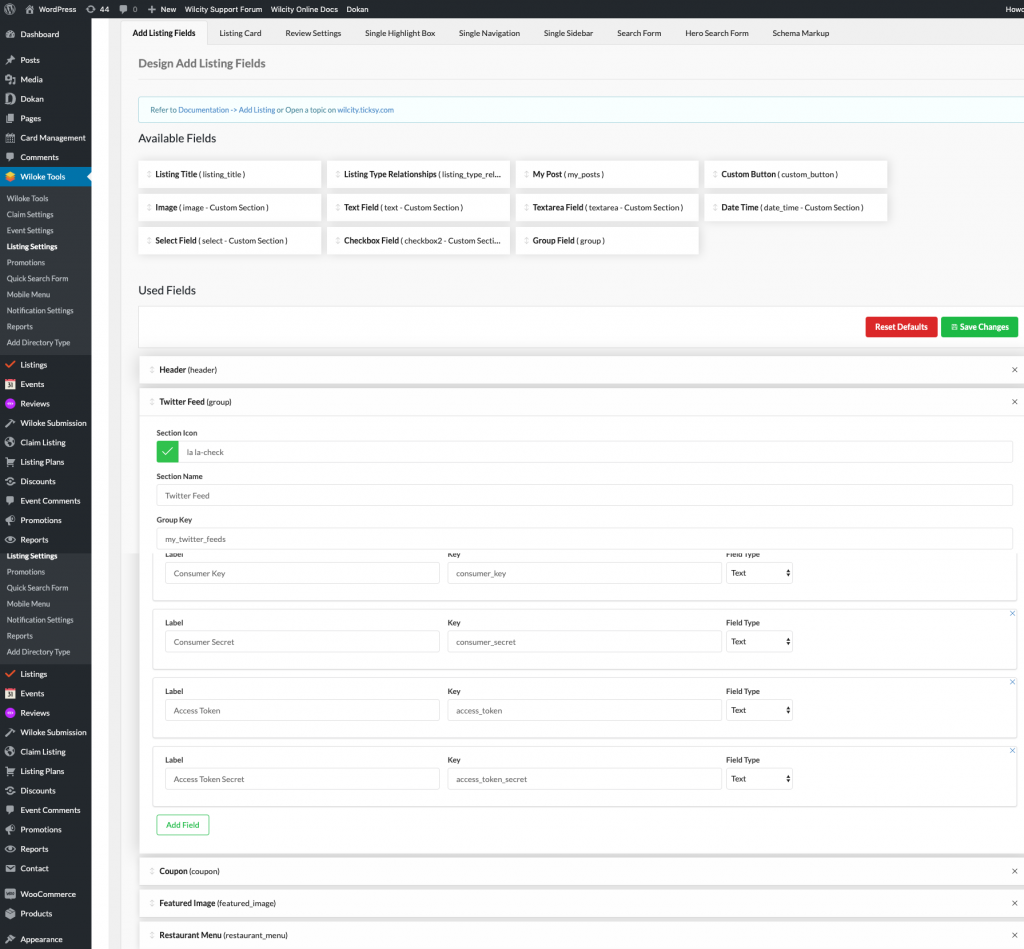
Step 2: Creating Twitter Configuration Group to Add Listing page

Clicking on Wiloke Tools -> Listing Settings -> Drag Group Field to Used Field. In the group field, You should add 5 fields with the following keys: usertimeline_text, consumer_key, cosumer_secret, access_token, access_token_secret and the group key is my_twitter_feeds

Step 3: Showing up Twitter Feeds on Single Listing page

Now, navigate to Single Navigation -> Add add new Section like this

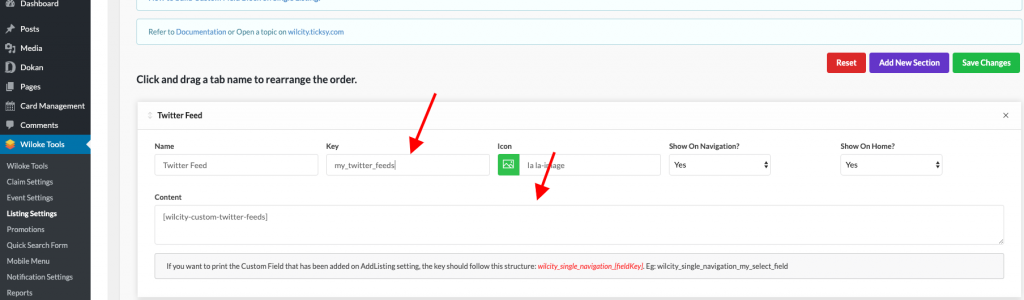
Key: my_twitter_feeds

Content: [wilcity-custom-twitter-feeds]

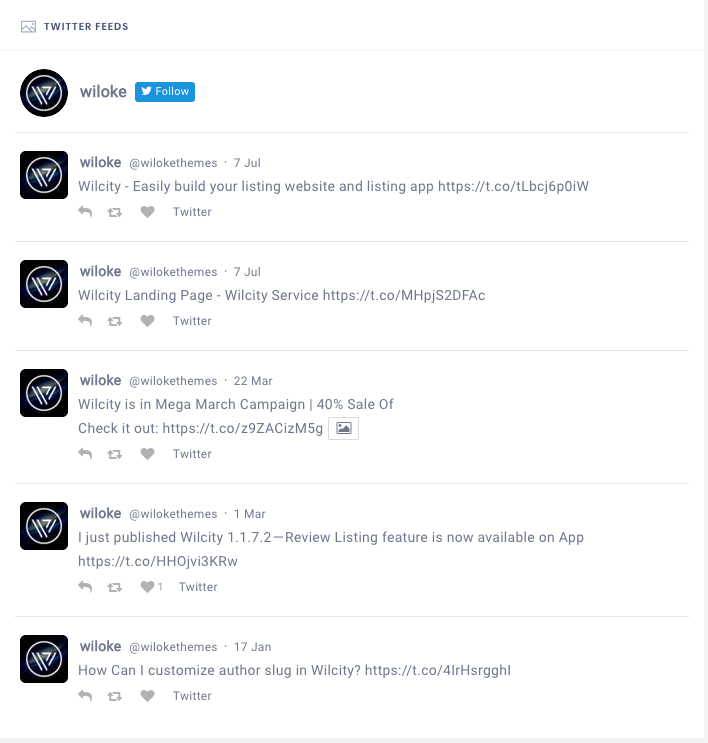
And here is what you get on the Front-end

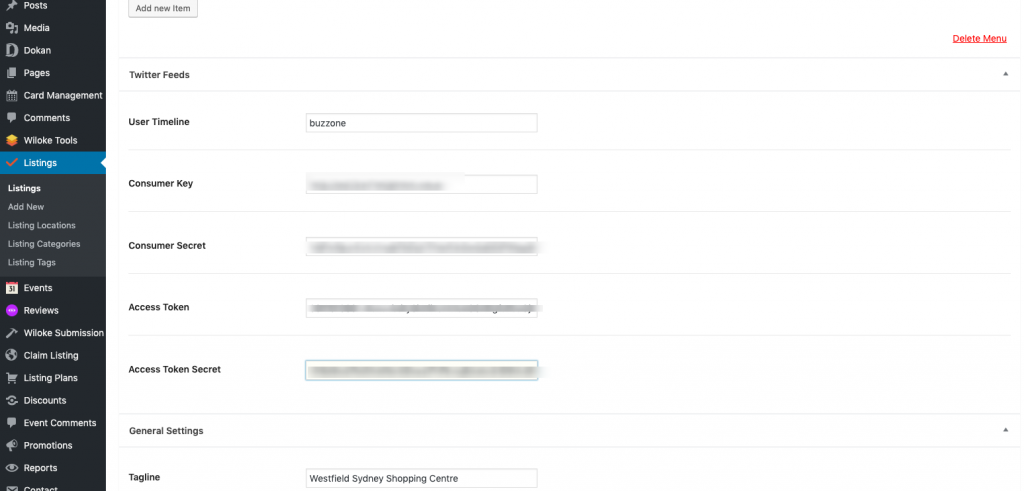
Twitter Configuration on the Front-end

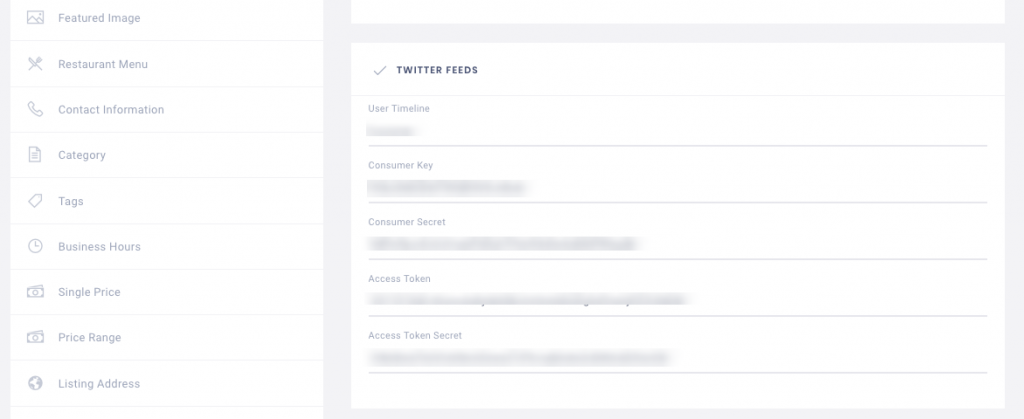
Twitter Configuration in the Back-end

Posted on Leave a comment

Wilcity Landing Page

As our promise on Wilcity Facebook Group, We will guide you to create your own Landing Page based on Wilcity Landing Tool.

After following our steps below, You can create a landing page looks like this: https://landing.wilcity.com/

Now, let’s do it.

Step 1: Downloading Wilcity Landing Tool

You can download the tool by clicking on me [sociallocker id=”1378″]https://www.dropbox.com/s/ym5omxq7zbbfe5k/wilcity-landing-tool.zip?dl=0[/sociallocker]

Step 2: Installing NPM in wilcity-landing-tool folder

  1. Extract the downloaded file, you will see wilcity-landing-tool folder.
  2. Open your terminal -> Run cd command line to the wilcity-landing-tool folder

Step 3: Building Hero Section

  1. Now, opening wilcity-landing-tool with an editor like Sublime Text or NotePad++.
  2. Going to src -> axiosFaker -> section1.js -> This is Hero section. You can change title, button, video background here.

Step 4: Building other sections

It’s the same what you did with the Hero section, you can simply open section you want to use and modify it.

The order of section in the app folder it similar to its order on the Wilcity Landing page

Step 5: Building App page Sections

You can see the app sections under src -> axiosFaker -> app folder. To modify it, please do the same web

Step 6: Setting up Navigation

To setup navigation, please open src -> axiosFaker -> navigation.js, here you can add / remove / modify the menu item.

Step 7: Building Production Version and upload to your hosting

After completing everything, We will build the production version and upload it to your hosting.

To build the production version, please run the following command lines:

yarn build

or

npm run build

The product files will be added under wilcity-landing-tool -> build folder -> Uploading those files to your hosting.

We hope this tutorial will help to create your own landing page. If you get any issue while creating the landing page, feel free open a ticket on https://wilcity.ticksy.com/tickets/